FrameVR
https://framevr.io/historyofaviation
Augmented Reality
Virtual Reality
Introduction
Throughout this semester, I’ve learned new skills in immersive technologies, including VR, AR, MR, and XR. I’ve discovered how these technologies can impact individuals and the world.
To begin with, all of these can be summed up within the Metaverse, which is when all virtual worlds come together under one roof, in an immersive world, that the user can experience from many different perspectives.
Virtual Reality (VR) is the simplest immersive technology, requiring only a head-mounted display (HMD). Users wear the HMD and headphones to become fully immersed in a 3D world of their choice, making it the most immersive form of metaverse technology.
Augmented Reality (AR) has gained global popularity in the last decade, largely due to the success of the game “Pokémon Go.” This AR game allows users to collect Pokémon displayed on their mobile phones in the real world, adding a sense of realism that may not be there on standard mobile or non AR games.
The rapid progression of digital technology in the last decade has made augmented reality more accessible and easier to experiment with, spurring new innovations and bringing in a lot more people to the worlds of augmented reality.
Mixed Reality (MR) blends together the real and digital worlds seamlessly. Examples include Google Glass and Microsoft HoloLens, which overlay digital images onto glasses lenses. Users can interact with these images, such as adding and manipulating digital objects like chairs, tables and anything else that you may be able to think of into the environment, blurring the lines between digital and physical realities and making it seem like one continuous world.
Extended realities, also known as XR, is commonly the umbrella term describing the use of VR, AR and MR. The metaverse could be known as an “extended reality” as it encompasses the whole range of the realities at hand.
Idea Generation:
The idea of my FrameVR project was conceived from there being countless examples of aviation museums and galleries existing in the real world, however there was a notable absence of them within the virtual world, therefore the aim was to capitalize on that gap in the market.
Another reason behind my decision to create a gallery on aviation history is because this is an intriguing area to learn about for many people as aviation plays a key part in the last 120 years of human history, therefore creating a digital gallery which could house up to 8 people at a time could be a very valuable tool in education and teaching as a whole, this brings a whole new level of interactivity that people normally wouldn’t be able to experience.
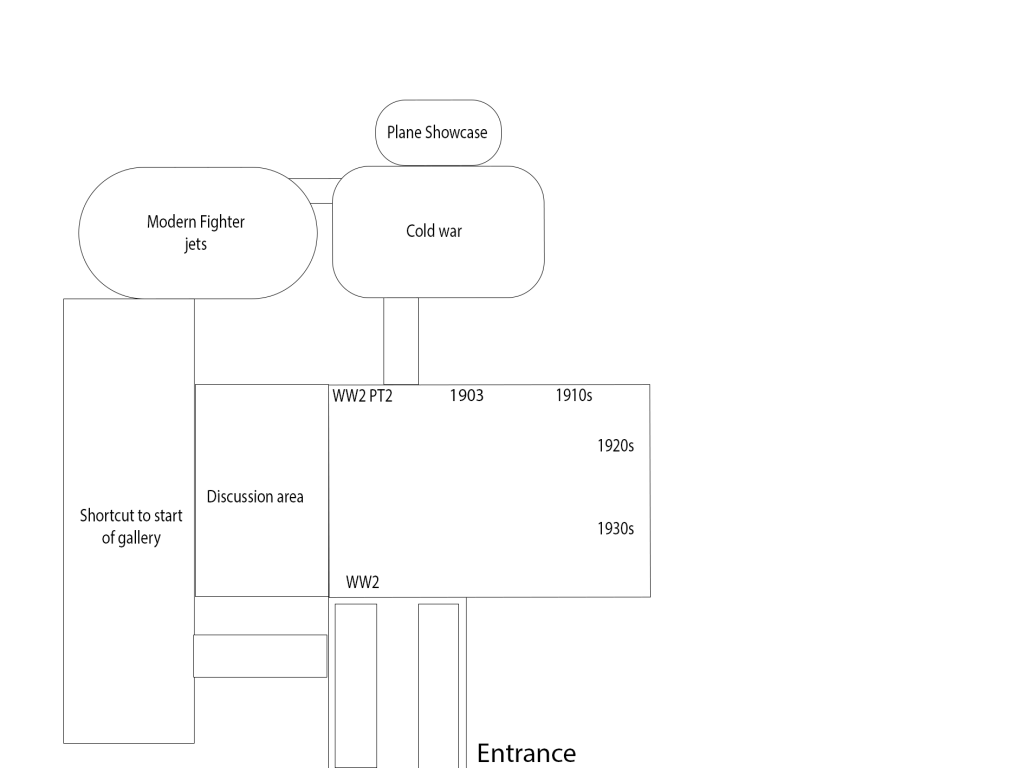
To help assist my idea generation for my frame VR project I created a small concept sheet, (Figure 1), for how I wanted my gallery to be laid out, I used the rough outline of my gallery and then added text to determine where I wanted to place my different sections.
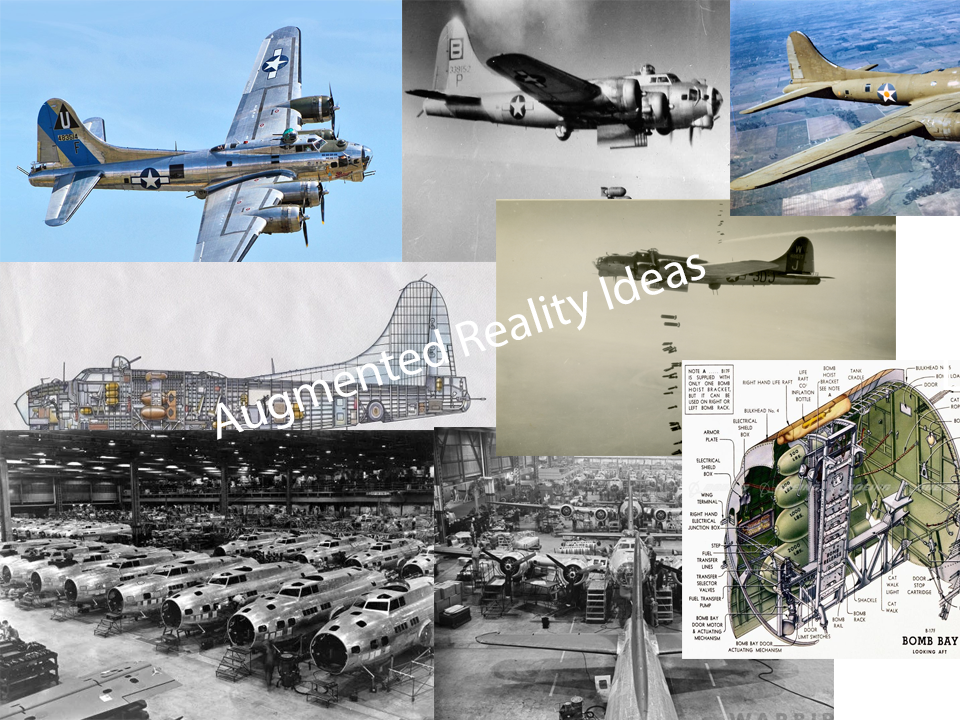
In addition to this I wanted to give myself a clear picture of how air museums display their planes so that I could re-create it, albeit at a smaller scale due to limitations in space, I did this by creating a Moodboard, (Figure 2), that showcases numerous ways that planes are displayed, and what planes are displayed together, this helped me make my mind up with which specific planes would be situated together.

For my AR project, my initial idea was of a Boeing B-17 Flying Fortress taking off from a runway, and then there being multiple cutaways of the plane with internals being shown as well as bombs being dropped, however due to limited time I had to cut the internals being shown portion of my project and only stick to the plane taking off and dropping bombs, however thankfully I was able to complete these two tasks within this project and in the end it worked out smoothly.
A way that I helped give myself ideas for my AR project was a moodboard,(Figure 3), in this moodboard I had my initial ideas of a plane production line, as well as my second and third ideas of cutaways and then a plane mid flight, this helped me further my own ideas and push myself to make new ones that could work out even better.
Challenges I overcame:
Throughout the production of the two tasks, several challenges were encountered, particularly with the WebVR project. The main challenge was making it more immersive, as the large amount of text could be off-putting and hinder progress. To address this, multiple scenes were created for the Cold War section of the gallery. This involved clicking a button,(Figure 4), in front of the planes to select a decade from the 1950s-1990s. This added interactivity significantly enhanced the gallery’s overall quality.
Initially for my FrameVR project, I was going to model the majority, if not all of the planes, however due to certain time constraints, I was unable to succeed in this task, therefore I needed to make the gallery a lot more immersive to enhance my own personal contribution to the project.
I ran into numerous problems when it came to creating my AR project, initially i was planning on using Zapworks for it, and progressed quite far into its development when I came across the first setback, which was animations not exporting correctly to unity, and therefore not exporting to Zapworks either.
I ended up coming to the decision to switch applications and begin using Adobe Aero, i also encountered some problems in this, due to keyframes not being interpreted by the software correctly, however after making sure all keyframes had a start and end position, even if it didn’t have a lot of animation data in-between them, i managed to make all the animations of the separate objects sync together into one coherent animation that works perfectly when using Adobe Aero to record it.
References:
andertan (2024a). Sketchfab. [online] Sketchfab. Available at: https://sketchfab.com/3d-models/lockheed-martin-f-16ef-fighting-falcon-d54c72e055a647ad9173e01548e50db3 [Accessed 5 Oct. 2024].
andertan (2024b). Sketchfab. [online] Sketchfab. Available at: https://sketchfab.com/3d-models/lockheed-martin-f35-lightning-ii-db911de503c74285a8d506951df786d6 [Accessed 1 Dec. 2024].
andertan (2024c). Sketchfab. [online] Sketchfab. Available at: https://sketchfab.com/3d-models/sukhoi-su-30-flanker-c-92ca062c90fd45ffb6ce8144dc46004a [Accessed 1 Dec. 2024].
andertan (2024d). Sketchfab. [online] Sketchfab. Available at: https://sketchfab.com/3d-models/chengdu-j10-vigorous-dragon-3a1a1863e9ba44e88d35da0d5f23caeb [Accessed 1 Dec. 2024].
andertan (2024e). Sketchfab. [online] Sketchfab. Available at: https://sketchfab.com/3d-models/shenyang-j31-gyrfalcon-23dbff530e21491299ac67bbab42b553 [Accessed 1 Dec. 2024].
andertan (2024f). Sketchfab. [online] Sketchfab. Available at: https://sketchfab.com/3d-models/shenyang-j11-flanker-l-aaa7700649fc43848020981313cc595c [Accessed 1 Dec. 2024].
bohmerang (2023a). Sketchfab. [online] Sketchfab. Available at: https://sketchfab.com/3d-models/boeing-b-52-stratofortress-38b0c64bd552431394efa8625d7f5144 [Accessed 15 Oct. 2024].
bohmerang (2023b). Sketchfab. [online] Sketchfab. Available at: https://sketchfab.com/3d-models/mig-29-fighter-jet-free-0a21787096244220b246ec8747e7b09c [Accessed 15 Oct. 2024].
bohmerang (2023c). Sketchfab. [online] Sketchfab. Available at: https://sketchfab.com/3d-models/f-22-raptor-fighter-jet-free-508de5c48845456bb033fb267ebe1d1e [Accessed 1 Dec. 2024].
bohmerang (2023d). Sketchfab. [online] Sketchfab. Available at: https://sketchfab.com/3d-models/f-15e-strike-eagle-fighter-jet-free-fff7d75490474e9b964d90cc031c8d01 [Accessed 1 Dec. 2024].
bohmerang (2024). Sketchfab. [online] Sketchfab. Available at: https://sketchfab.com/3d-models/eurofighter-typhoon-fighter-jet-free-992bcc8987964ca09d55410330aa8579 [Accessed 1 Dec. 2024].
Boris.Goncharuk (2019). Sketchfab. [online] Sketchfab. Available at: https://sketchfab.com/3d-models/potez-25-f4f0a878de0444a38ba3d6aef5fe6ece [Accessed 10 Oct. 2024].
Collaro_Show (2024). Sketchfab. [online] Sketchfab. Available at: https://sketchfab.com/3d-models/su57-469b7d36d6254c30b96d78563a054977 [Accessed 1 Dec. 2024].
Götz von Berlichingen (2024). Sketchfab. [online] Sketchfab. Available at: https://sketchfab.com/3d-models/messerschmitt-163-low-poly-efd3765279bf44209917c88c0c794875 [Accessed 12 Oct. 2024].
Harri Jones (2022). Sketchfab. [online] Sketchfab. Available at: https://sketchfab.com/3d-models/wilfrid-wop-mays-sopwith-camel-toy-1c76815683054b94ab5cbc401a9a511a [Accessed 10 Oct. 2024].
helijah (2015). Sketchfab. [online] Sketchfab. Available at: https://sketchfab.com/3d-models/bleriot-5190-d9df3ed728094443b73a5b6a37f189ed [Accessed 10 Oct. 2024].
Kai Xiang (2019). Sketchfab. [online] Sketchfab. Available at: https://sketchfab.com/3d-models/lowpoly-b-29-superfortress-29d5ea108bb344149c917db9d577e220 [Accessed 12 Oct. 2024].
manilov.ap (2017a). Sketchfab. [online] Sketchfab. Available at: https://sketchfab.com/3d-models/flyer-7d9d037fda1f412ba8625277d0b26777 [Accessed 10 Oct. 2024].
manilov.ap (2017b). Sketchfab. [online] Sketchfab. Available at: https://sketchfab.com/3d-models/ju88-9d7456f25298471aa7b736f2e1c3ffd9 [Accessed 11 Oct. 2024].
manilov.ap (2017c). Sketchfab. [online] Sketchfab. Available at: https://sketchfab.com/3d-models/f6f-d64f29e7f1c144e6a0712ea12d83a91e [Accessed 11 Oct. 2024].
manilov.ap (2017d). Sketchfab. [online] Sketchfab. Available at: https://sketchfab.com/3d-models/harrier-9ccfd6758680413bb19d656db4f46185 [Accessed 15 Oct. 2024].
manilov.ap (2017e). Sketchfab. [online] Sketchfab. Available at: https://sketchfab.com/3d-models/su34-1c94f436be51453fa598e9eab50eb0a7 [Accessed 1 Dec. 2024].
philano (2023). Sketchfab. [online] Sketchfab. Available at: https://sketchfab.com/3d-models/b-25-mitchell-6c7b7889dc6143ef9f9ab162ce6860d2 [Accessed 11 Oct. 2024].
Postman George (2024). Sketchfab. [online] Sketchfab. Available at: https://sketchfab.com/3d-models/raf-spitfire-n3201-f4c1c711d2764fa6aecdc5bc8fac9db1 [Accessed 11 Oct. 2024].
RafalTlalka (2018). Sketchfab. [online] Sketchfab. Available at: https://sketchfab.com/3d-models/old-ww1-plane-low-poly-4eb4165e275a4779acfd57c59d482c98 [Accessed 10 Oct. 2024].
Secret Weapons – Arma 3 Mod (2024). Sketchfab. [online] Sketchfab. Available at: https://sketchfab.com/3d-models/helijahs-me-262-9af086bc21a64400ade304876218ca62 [Accessed 12 Oct. 2024].
Yo Boy (2020). Sketchfab. [online] Sketchfab. Available at: https://sketchfab.com/3d-models/lancaster-mkii-2f880eec91c74e3db0b2ab04e47b1fb6 [Accessed 11 Oct. 2024].
In this blog post I will run through all of the Phase 3 assets that I was tasked with making for the major project.
Trays
To create this tray, I created a cube and scaled it down, I then used a lot of Booleans this was to cut out the specific squares that I wanted on the trays, I then fixed the UVs and Normals as this amount of Booleans really messed my UVs up.
Drinking glasses
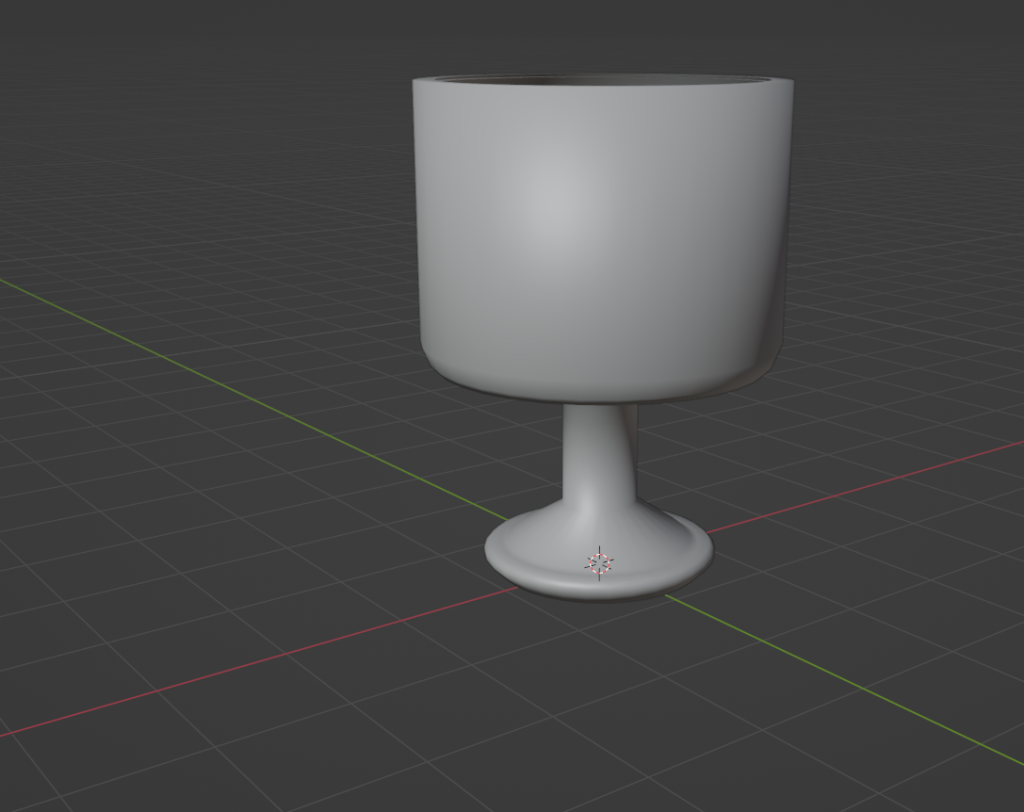
For this glass I used a circle which I extruded in different ways to create the shape of the glass, I then smoothed the whole thing to make it look like glass in terms of roughness.
Assortment of glasses
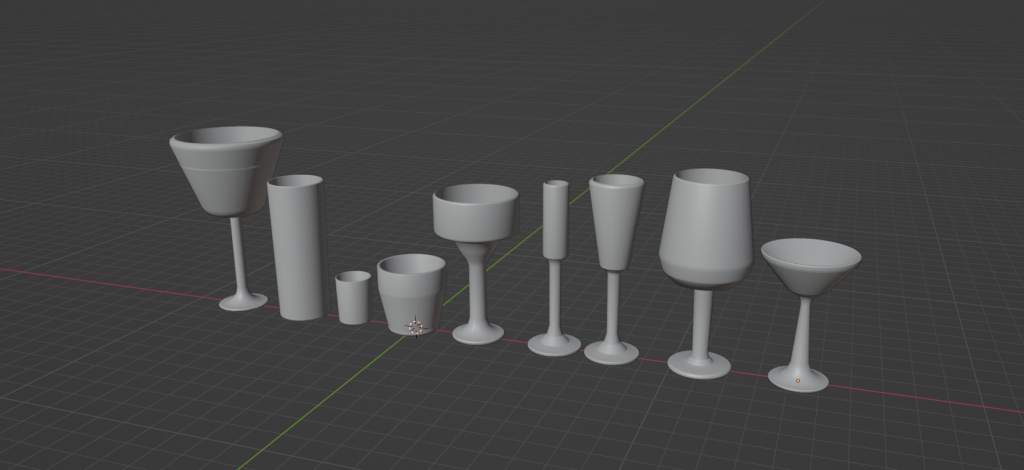
For the remaining glasses I did the same technique as the first glass.
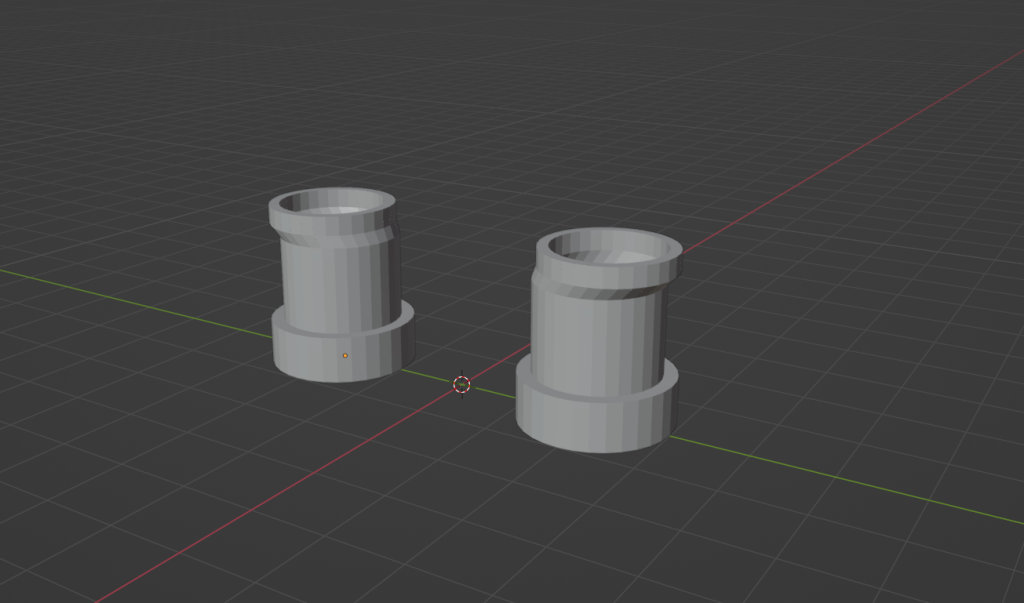
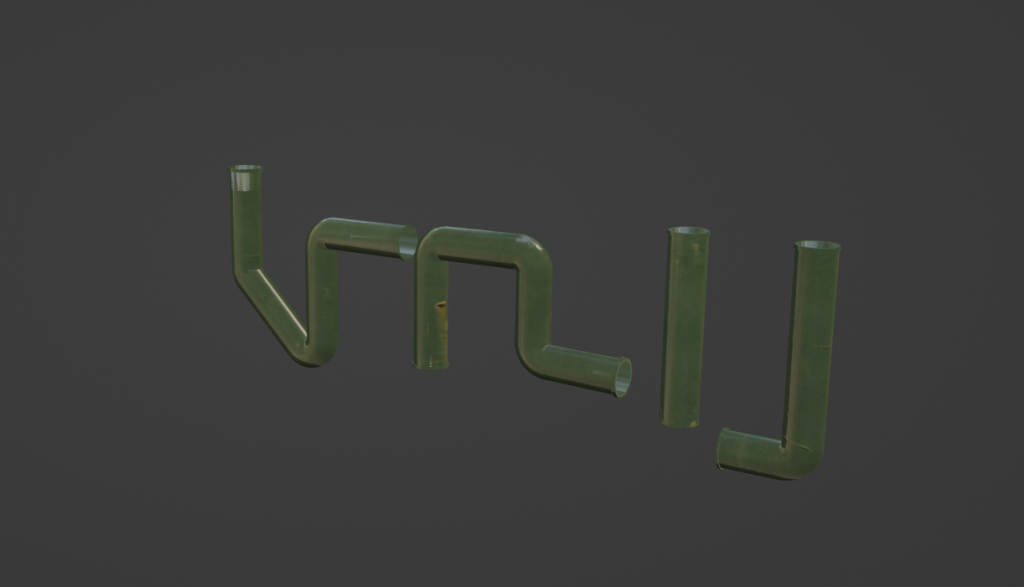
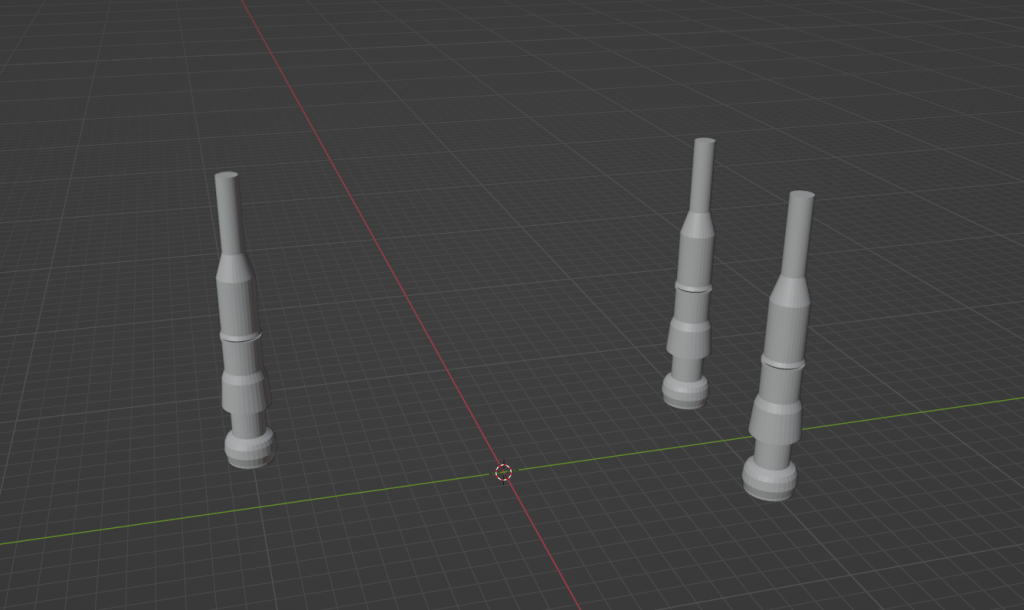
Pipes
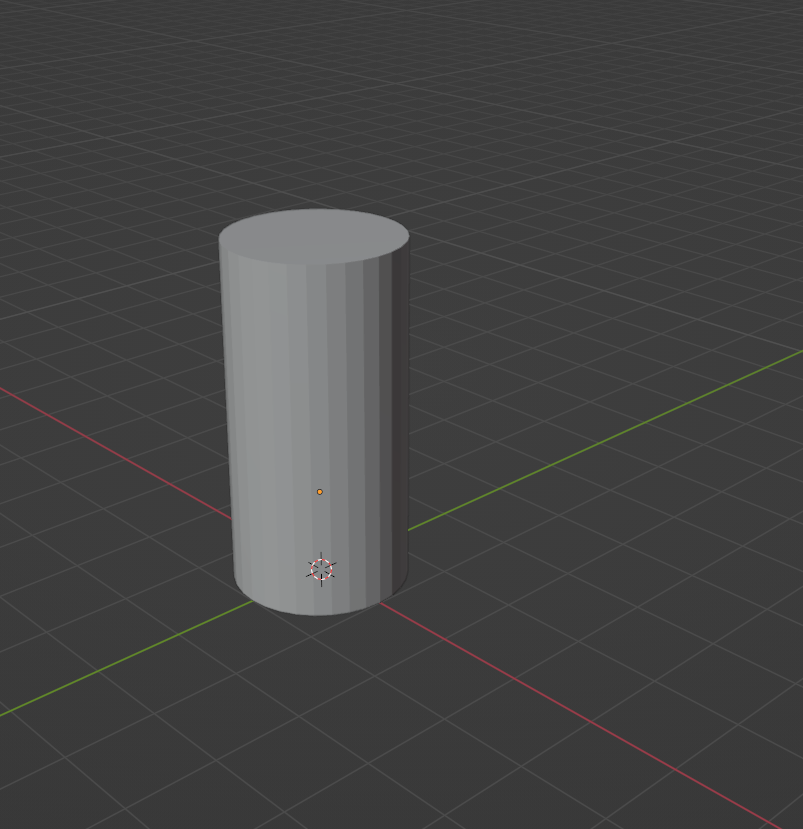
To create the pipes that will be used in the engine room, I started out with a singular cylinder.

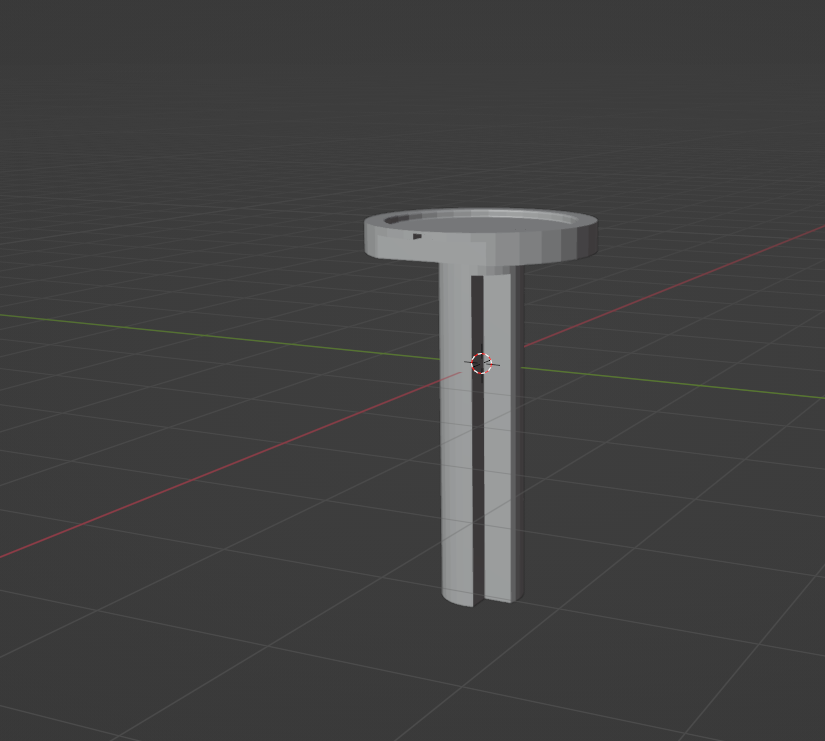
To create the pipe shapes, I used the spin tool to turn the cylinders in different ways/degree amounts to create various types of pipes, to finish the ends of the pipes off I extruded the ends outwards, then insetted the face and shrunk it down and then deleted it.
I did this because it makes the pipe look like it can be connected to other pipes.
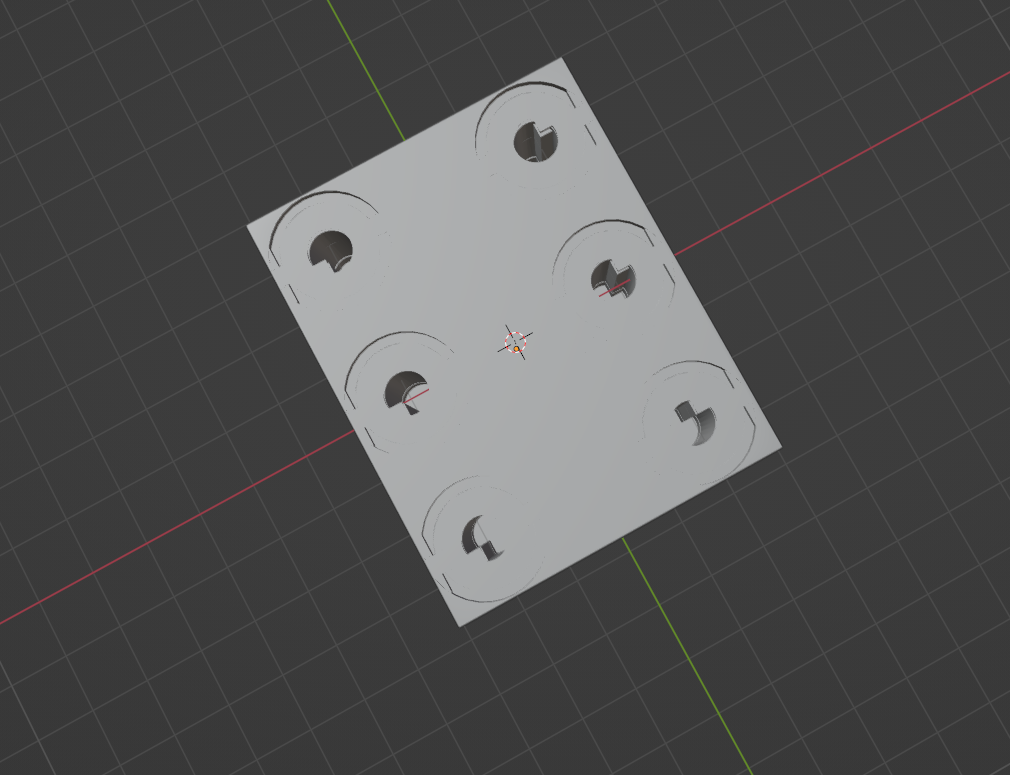
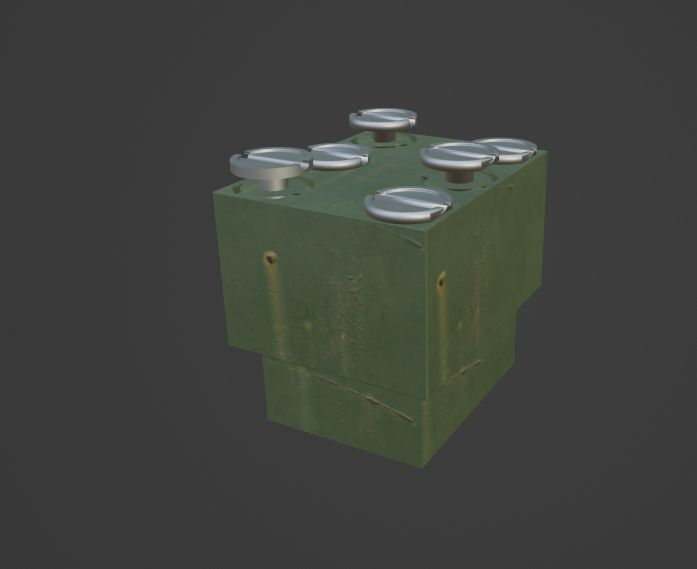
Piston Blocks
To create the piston blocks, I started out by creating the pistons that will go into the block.
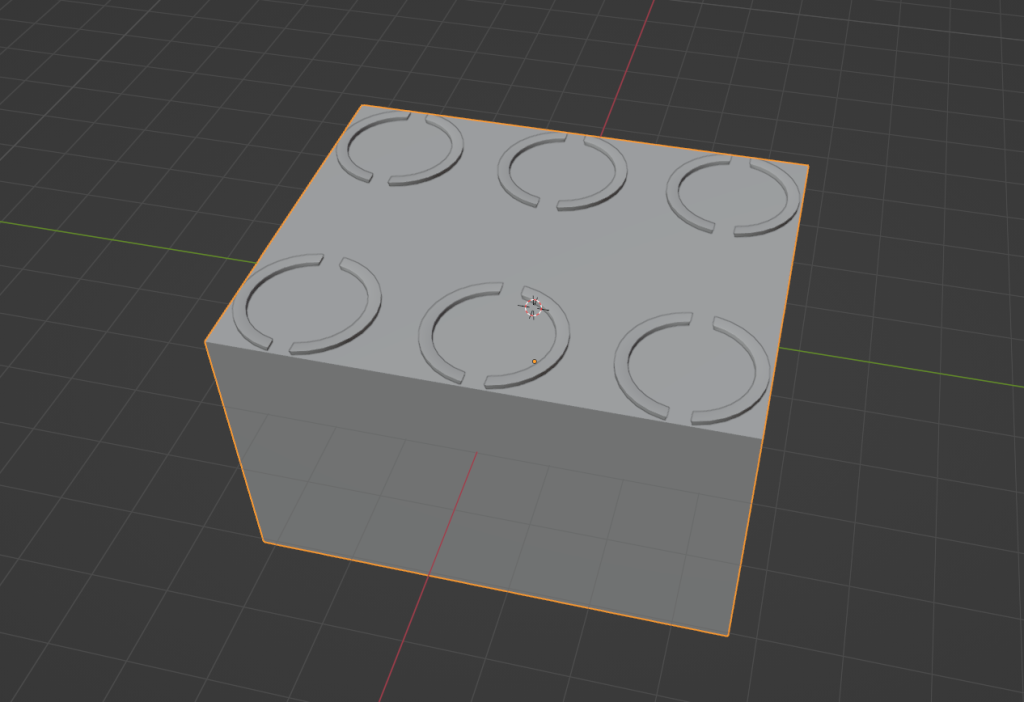
I then created the block which is a square that has been extruded from the bottom and made smaller.
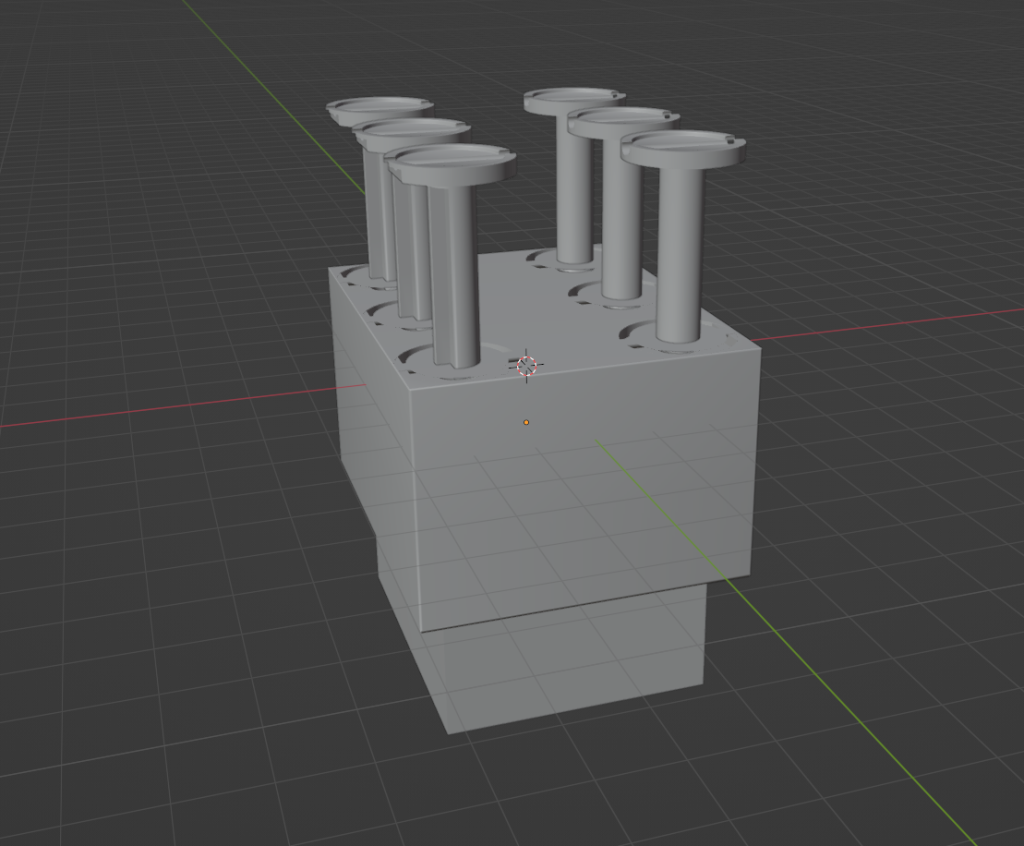
I attached the pistons to the block and then booleaned the objects so that the pistons would cut out holes where they would go up and down in. I did this to make sure I’m not breaking immersion by having the pistons phasing and clipping through the block.
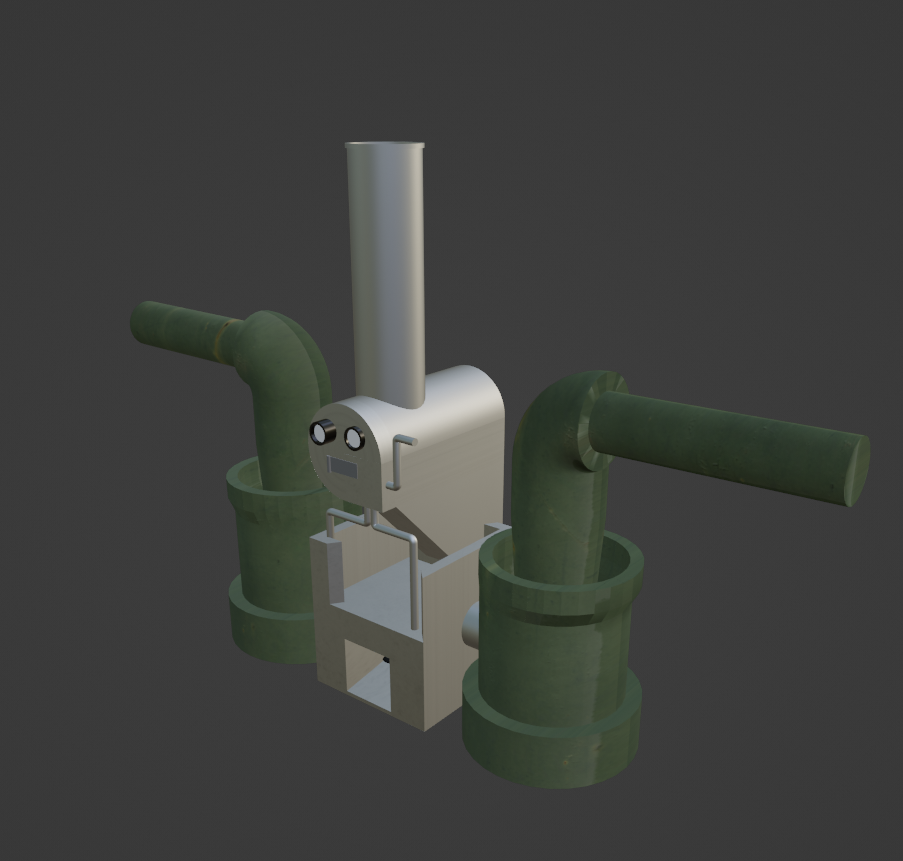
Engine
To create the engine, I began by mirroring a cylinder along the y axis and extruding it in various ways.
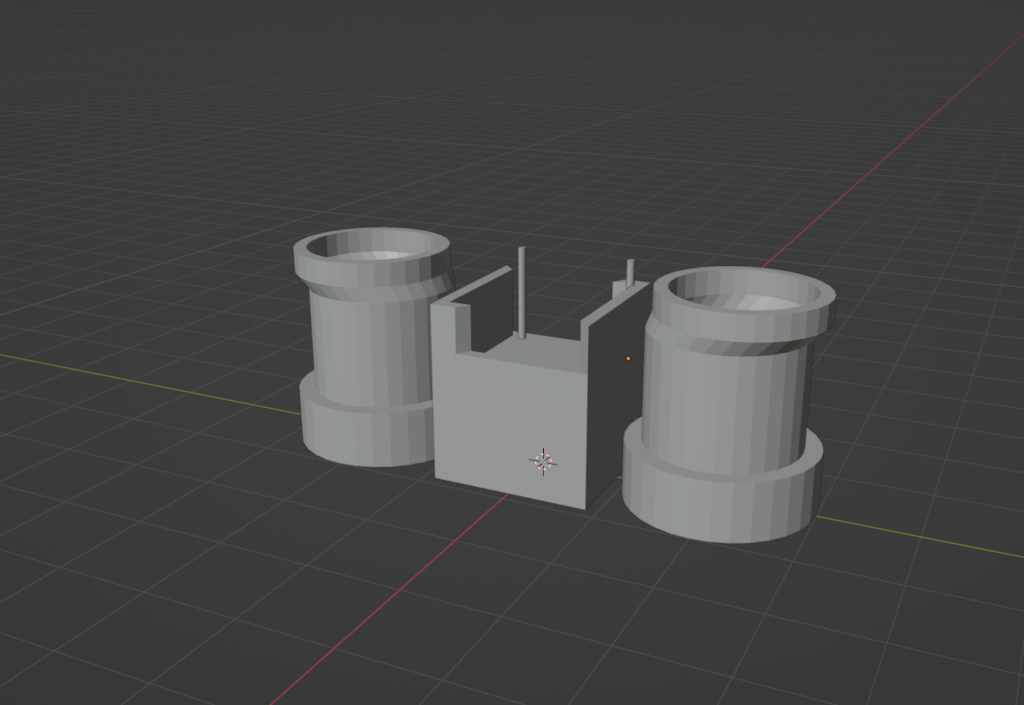
I then added a box in the middle of these cylinders with some small pipes going out of the back of it, this is where the piston box will live in the final game.
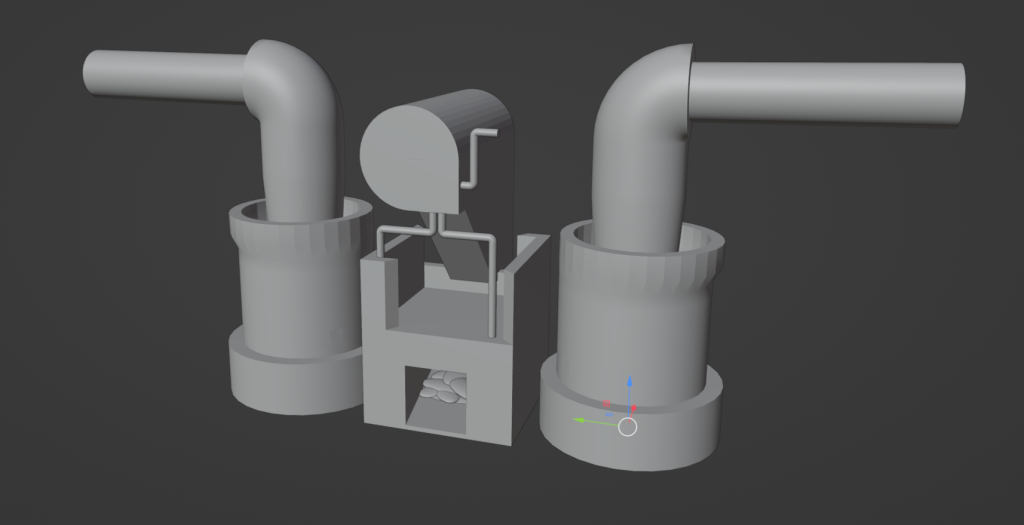
I then added an area inside of the box for coal to go as this is a steam ship, i also added off shooting pipes which go to the paddle, I also added a housing unit for the valves/gauges and some more pipes/levers.
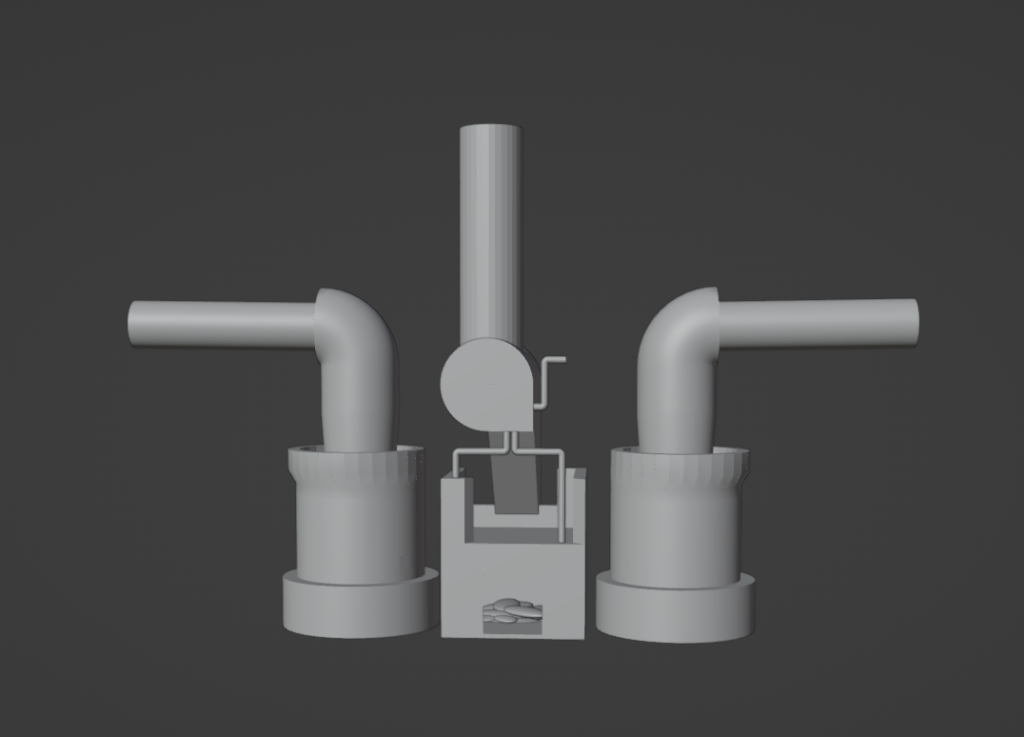
I added a pipe that goes towards the roof which is where the smoke goes.
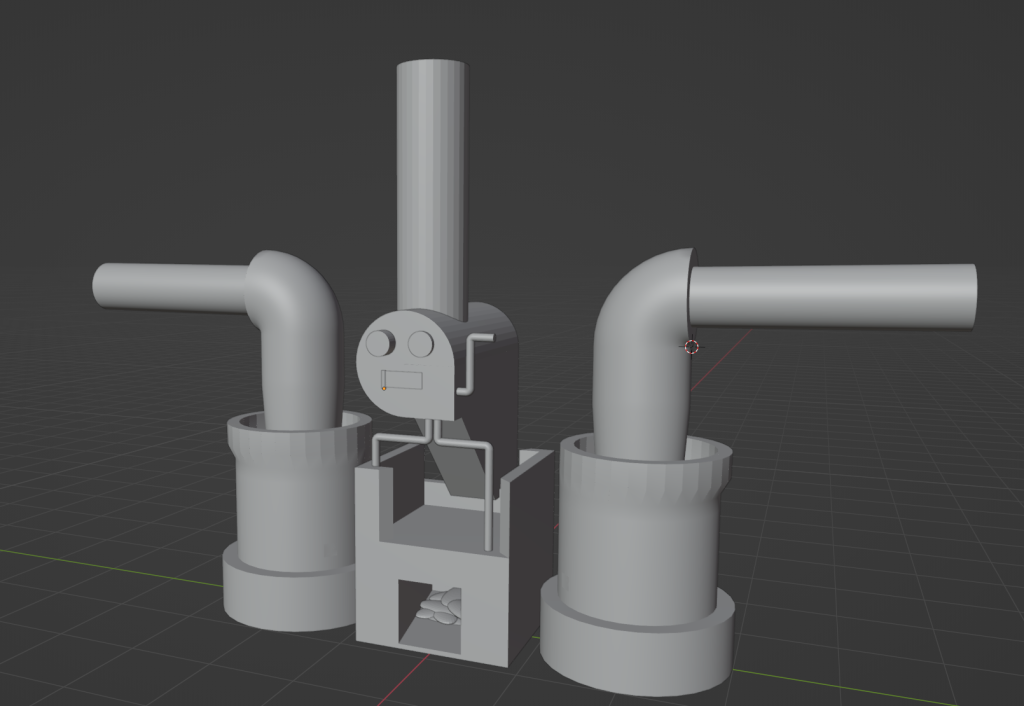
Finally I added a metal flap and 2 gauges to the housing unit.
Antique Burr Walnut & Sycamore Wardrobe
Wood Cabinet Worn Long Texture • Poly Haven
AmbientCG, (N.D), Carpet 015, Available Online, Carpet 015 on ambientCG, [Accessed Online 04/05/23]
AmbientCG, (N.D) Fabric 026, Available Online, Fabric 026 on ambientCG, [Accessed Online 04/05/23]
AmbientCG, (N.D) Leather 034 c, Available Online, Leather 034 C on ambientCG [Accessed Online 26/04/23]
AmbientCG, (N.D) Metal 041 A, Available Online, Metal 041 A on ambientCG [Accessed Online 26/04/23]
AmbientCG, (N.D) Painted Wood 003, Available Online, Painted Wood 003 on ambientCG, [Accessed Online 03/05/23]
AmbientCG, (N.D) Wallpaper 001 A, Available Online, Wallpaper 001 A on ambientCG [Accessed Online 04/05/23]
AmbientCG, (N.D) Wood 027, Available Online, Wood 027 on ambientCG [Accessed Online 02/05/23]
AmbientCG, (N.D) Wood 033, Available Online, Wood 033 on ambientCG [Accessed online 28/04/23]
AmbientCG, (N.D) Wood 058, Available Online, Wood 058 on ambientCG [Accessed Online 26/04/23]
AmbientCG, (N.D) Wood Siding 005, Available Online, Wood Siding 005 on ambientCG [Accessed Online 02/05/23]
AmbientCG, (N.D) Wood, 002, Available Online, Wood 002 on ambientCG [Accessed online 06/05/23]
AmbientCG, (N.D) Tiles 074, Available Online, Tiles 074 on ambientCG [Accessed Online 06/05/23]
AmbientCG, (N.D) Tiles 104, Available Online, Tiles 104 on ambientCG [Accessed Online 06/05/23]
Poly Haven, (N.D) Brown Leather Texture, Available Online, Brown Leather Texture • Poly Haven [Accessed Online 02/04/23]
Poly Haven, (N.D) Green Metal Rust Texture, Available Online, Green Metal Rust Texture • Poly Haven [Accessed online 01/04/23]
Poly Haven, (N.D) Leather Red 03 Texture, Available Online, Leather Red 03 Texture • Poly Haven [Accessed Online 01/04/23]
Poly Haven, (N.D) Plywood Texture, Available Online, Plywood Texture • Poly Haven [Accessed Online 01/04/23]
Poly Haven, (N.D) Wood Cabinet Worn Long Texture, Available Online, Wood Cabinet Worn Long Texture • Poly Haven [Accessed Online 02/04/23]
Throughout the Major Project I have received some feedback from the group about models that could be changed and or improved, in this post I will go through some of these.
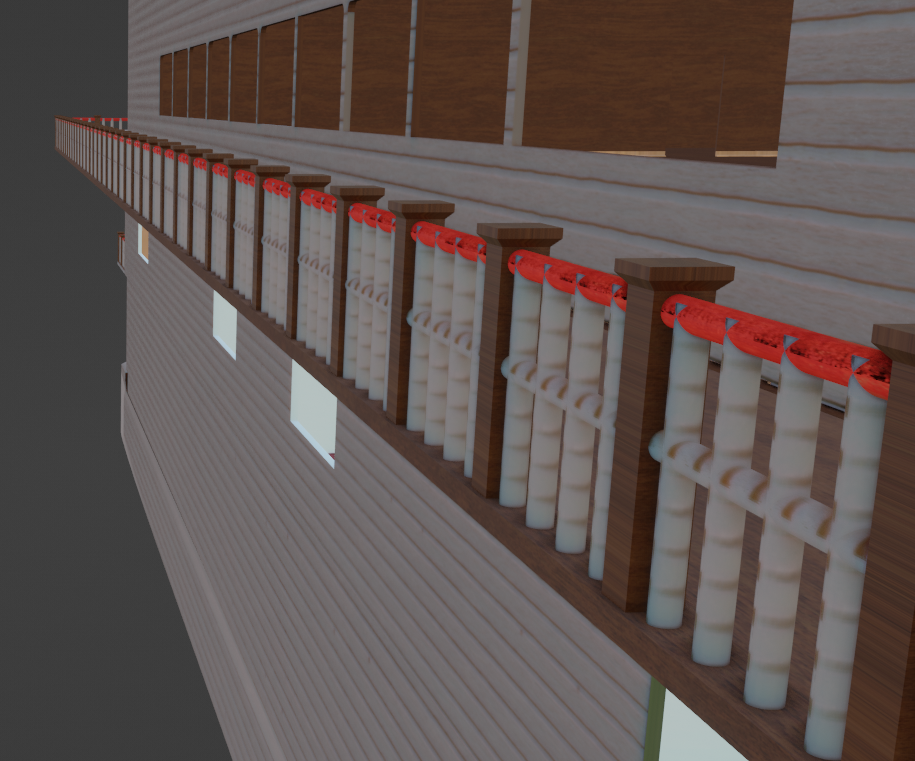
Feedback 1:
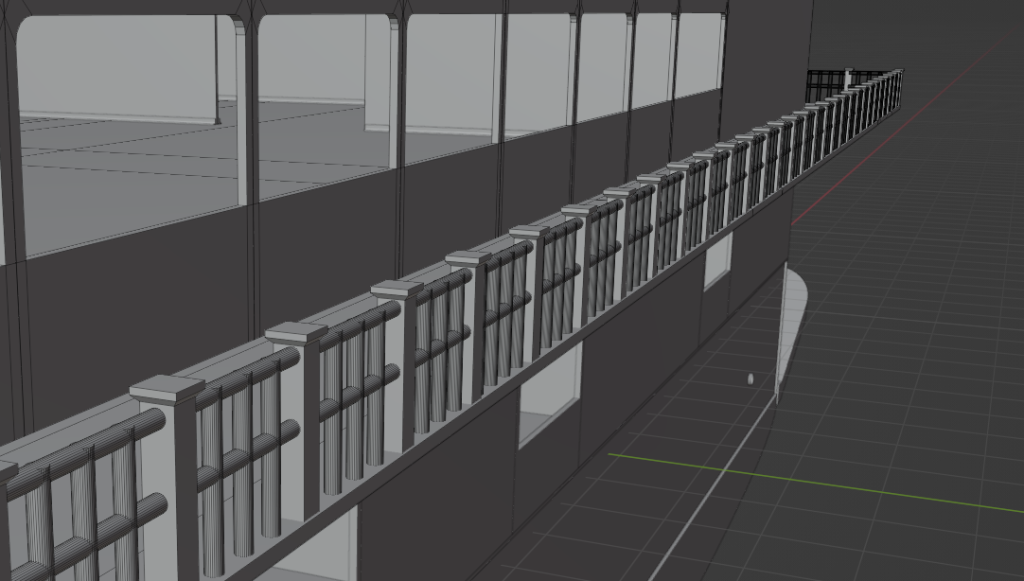
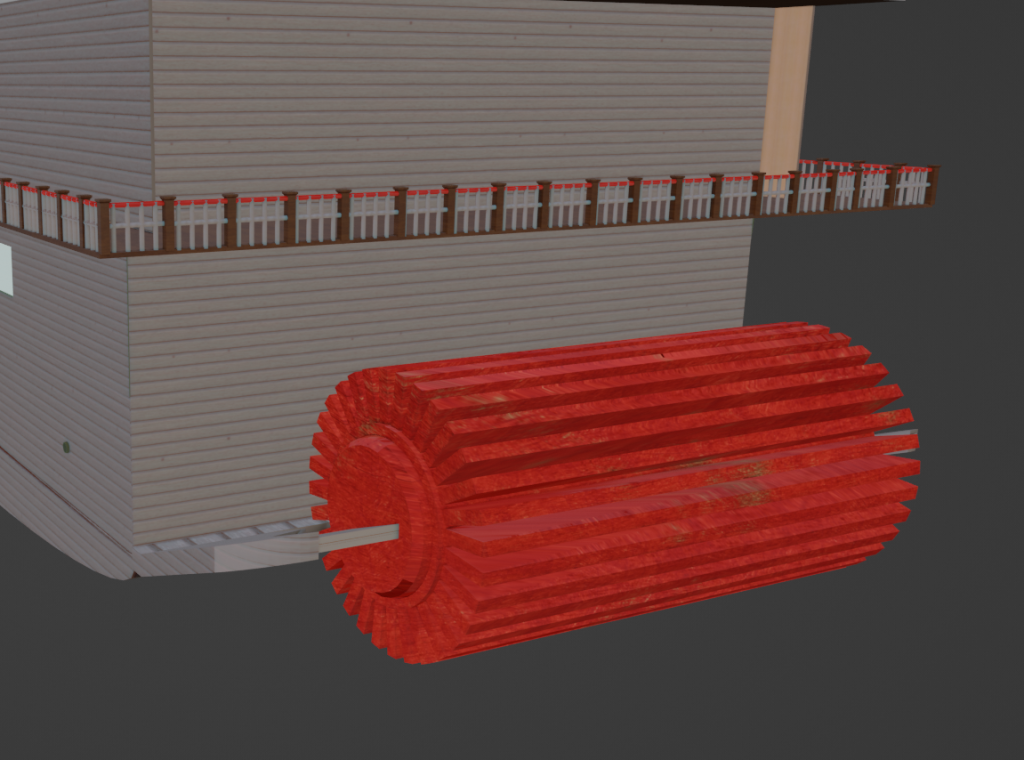
One bit of feedback was that my barriers on the outside of the boat had issues with collisions and also Normals, I was then asked if I could change them up and remake them, I then made a completely new barrier which was a big improvement over the previous one.
Feedback 2:
Towards the end of the project, when I was importing my boat into unreal, I ran into some issues with the Normals and backfaces. To optimize the boat, we decided on joining the whole boat together inside of Blender and importing into unreal, this however caused issues with some parts of the boat being invisible. I fixed this by spending some time flipping and recalculating Normals to make sure everything meant to be visible stays visible.
Feedback 3:
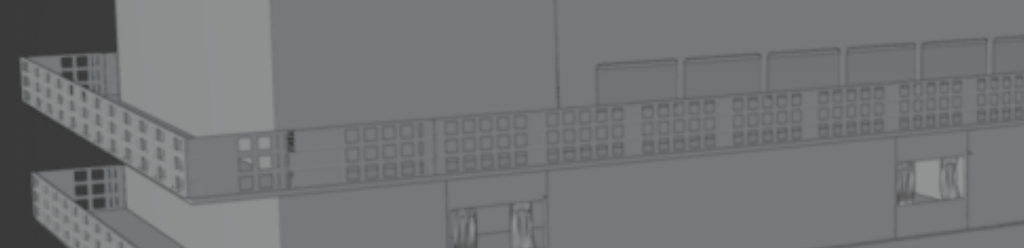
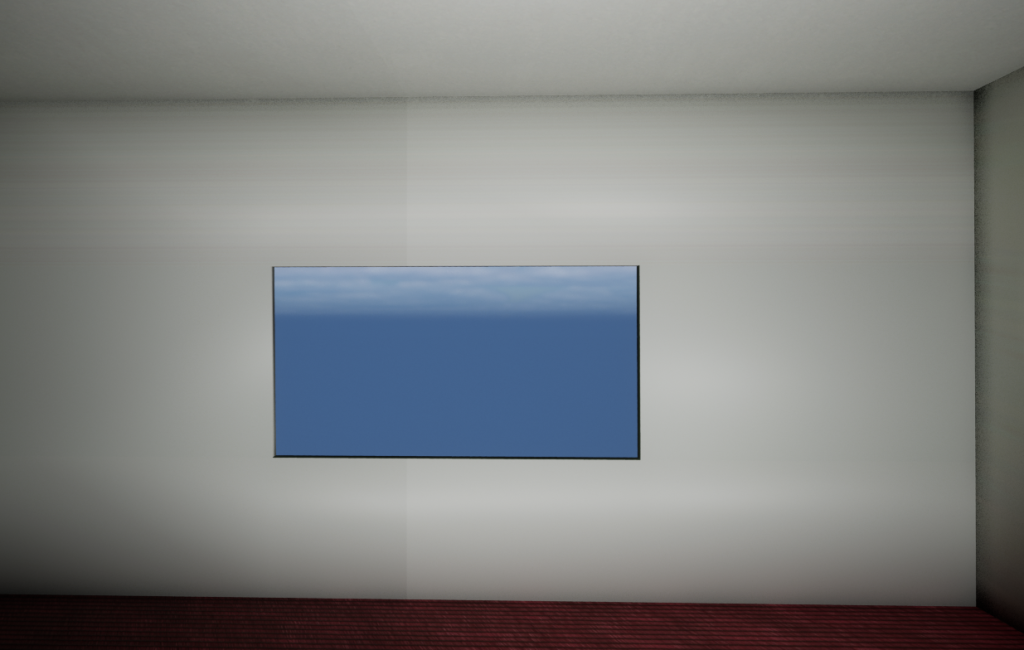
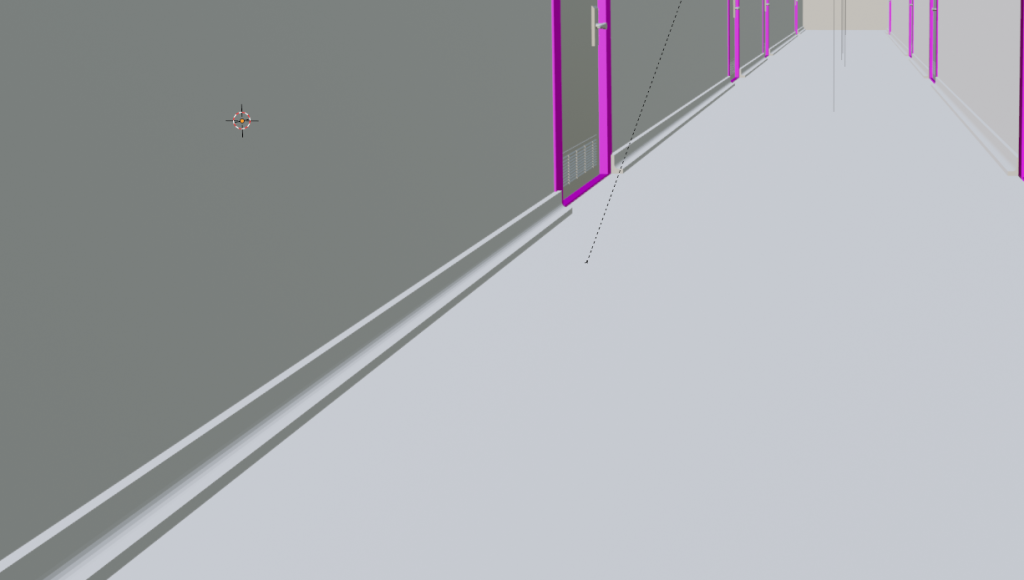
It was brought to my attention that I had some mesh issues with the boat, this being that the bedroom window had broken topology, this was only visable in unreal therefore it could damage the experience of the game, below is an image of the problem.
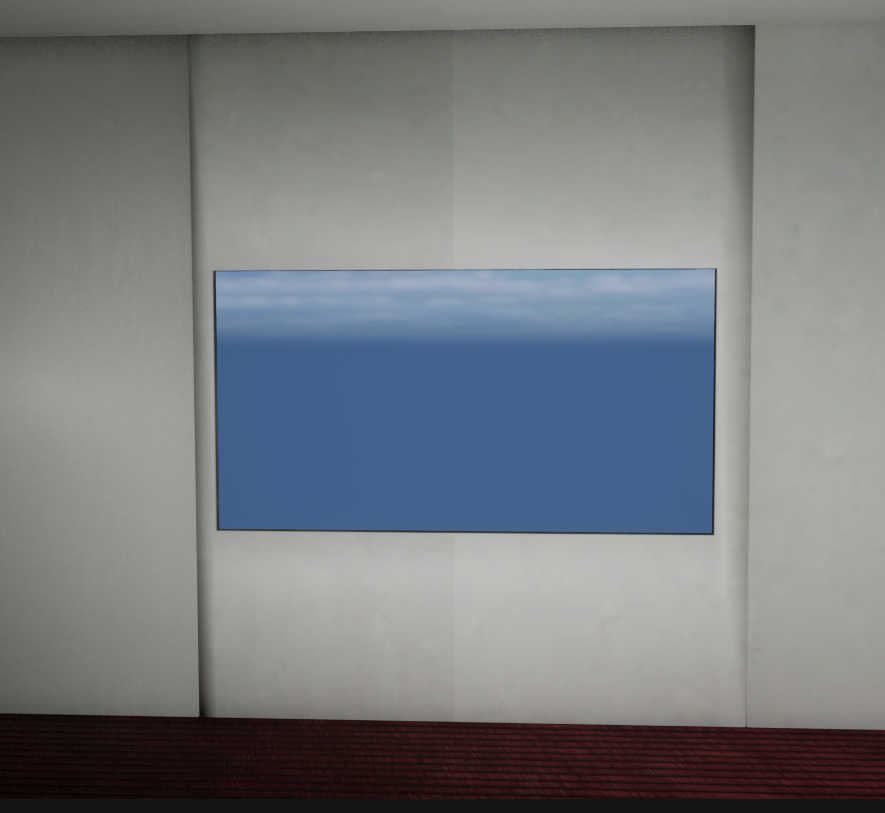
To fix this I decided to remake the wall out of one continuous mesh to avoid any errors. Below is an image of the fixed version.
In this blog I will go present images of my assets once they have been textured with materials from Poly haven and AmbientCG
Phase 1
Sink
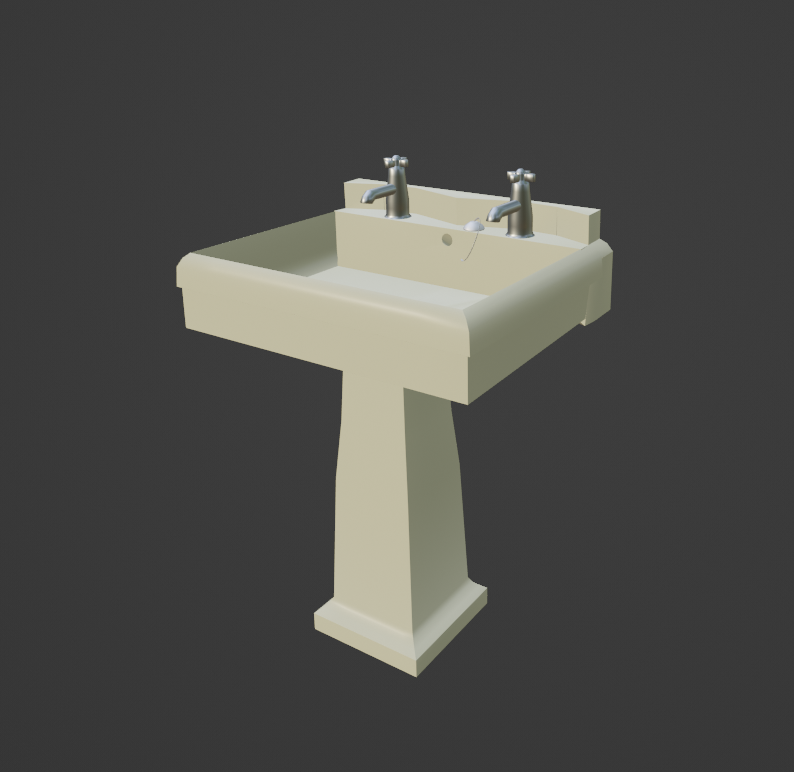
For the sink I went with 2 textures, the first being metal for the taps and plug, and secondly a cream colour for the sink. I did the cream colour as it looks like porcelain which was heavily used during this time period on appliances like sinks.
Bath
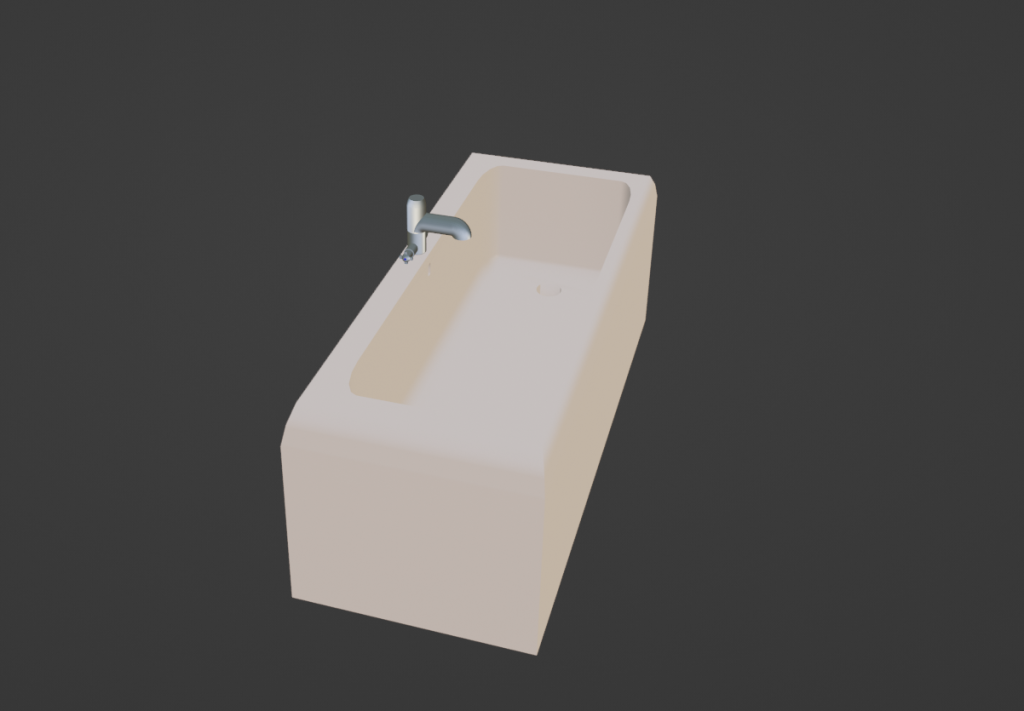
For the bath I used similar textures as the tap, this is because they are in the same area at all times and also because it is the type of material used during the time period.
Wardrobe
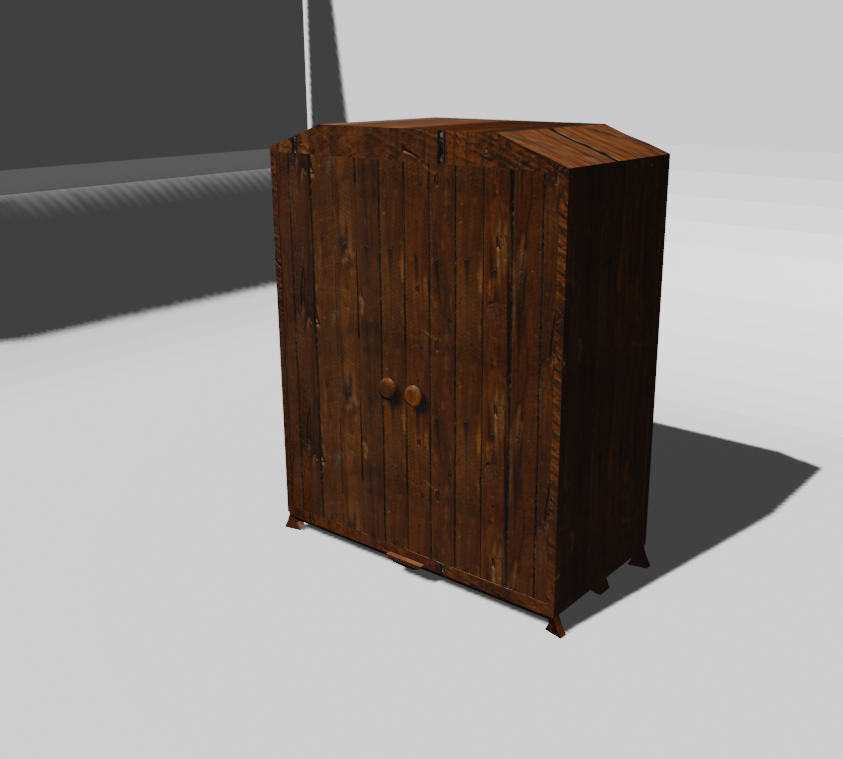
The wardrobe is textured in dark wood as I think it suited the design more than light wood or other types of wood, I also did this as wood is the most common material used for wardrobes.
Snub Revolver
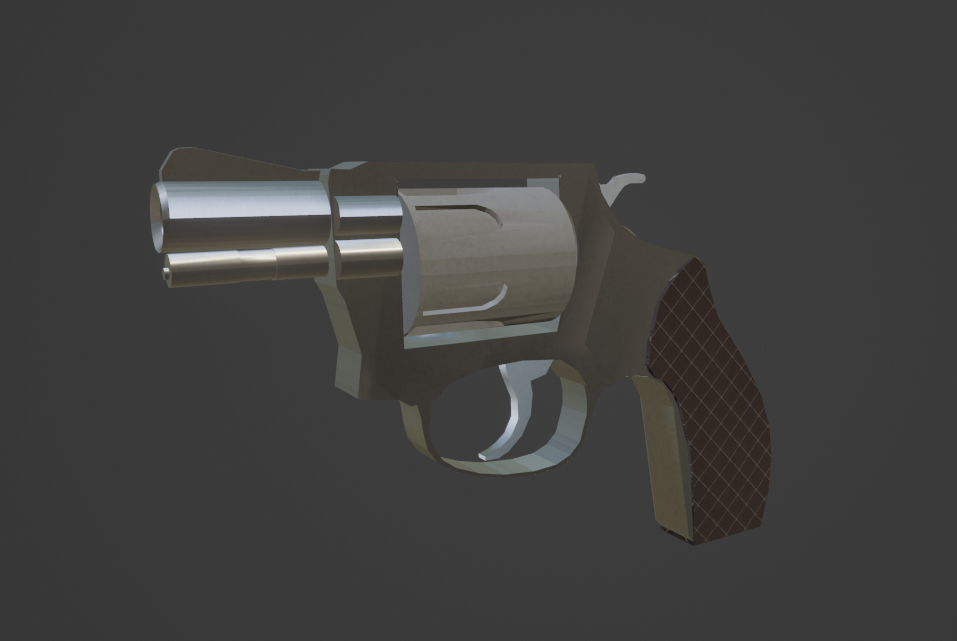
For the snub revolver i used 2 types of metal, the first being shiny metal for the barrel of the revolver, and also the trigger, secondly, I used a rough metal texture for the body and chamber/hammer of the revolver, this is because I think it suits the revolver better than being entirely shiny.
Finally, I used a fabric type texture for the grip, this is because it would not look right or be appealing if the entire revolver was metal, this is because of the perception that metal is rough and cold while fabric can be warm and soft.
Toilet
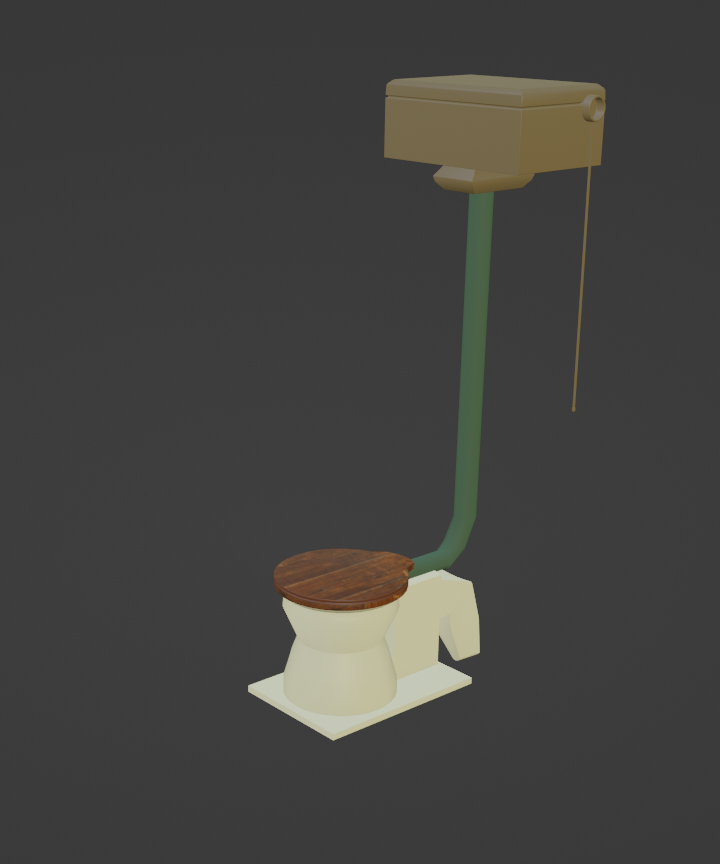
For the toilet i used a few textures, these being a green rough texture for the pipe, a dark yellow box, a cream base of the toilet and also a wood lid.
Phase 2
Kitchen Tables
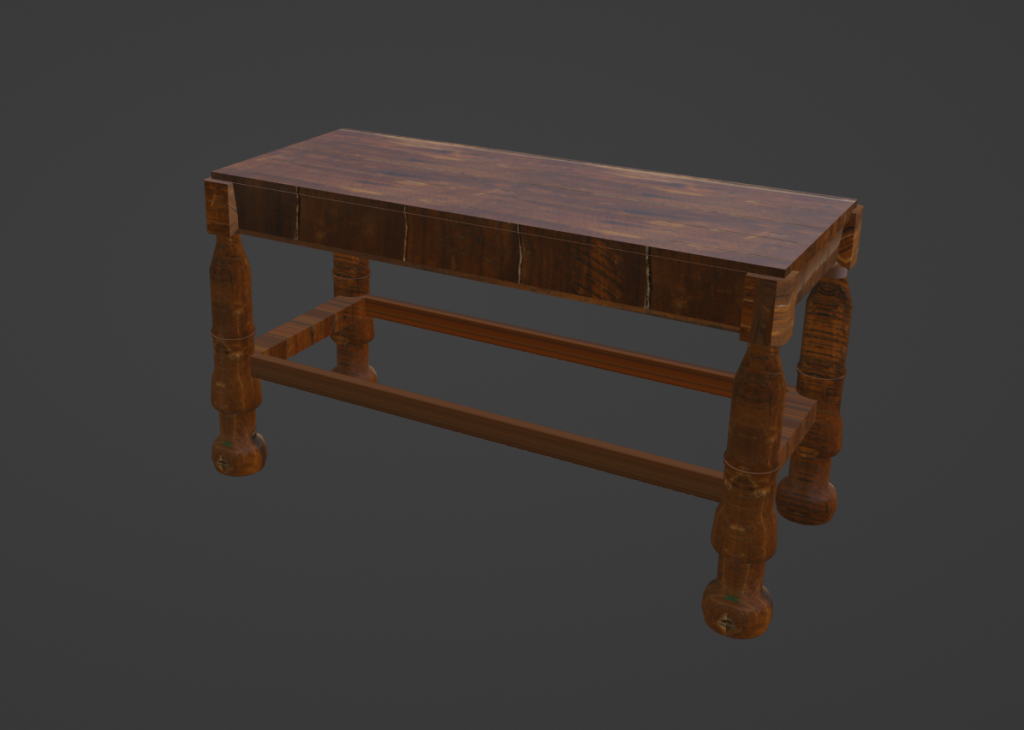
I used the same wood texture that i used for the wardrobe here as I wanted to keep a consistent style throughout the boat with the type of wood used on objects.
Sitting Chair
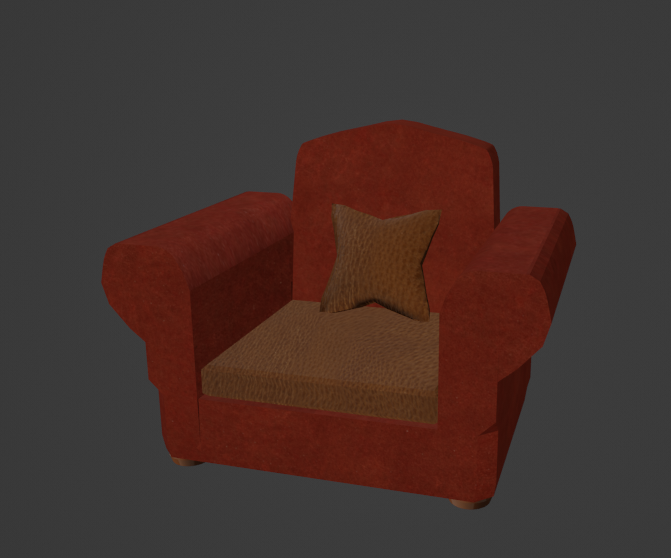
For my sitting chair I used 3 textures, these being a red fabric, brown leather and also wood.
The first of these was used for the body of the sitting chair, i used this texture as I thought it was
Bowl
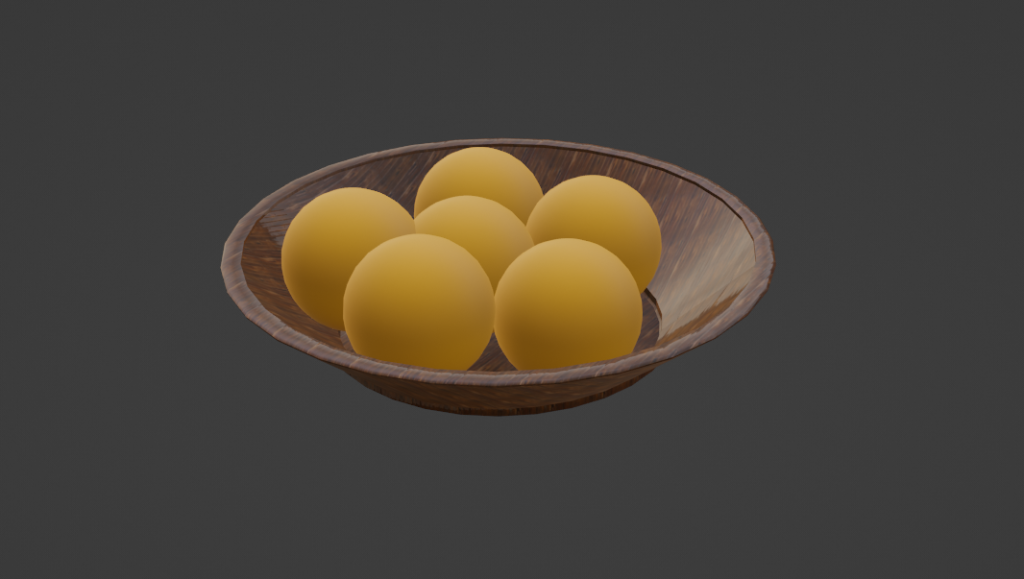
For the fruit bowl, I used the same wood material as the other wood objects, however I also an orange/yellowy texture for the oranges, initially i had a very high-quality texture for it, however I didn’t want to limit performance or make it look out of place so i swapped it for a scaled back texture like this.
Dining Tables
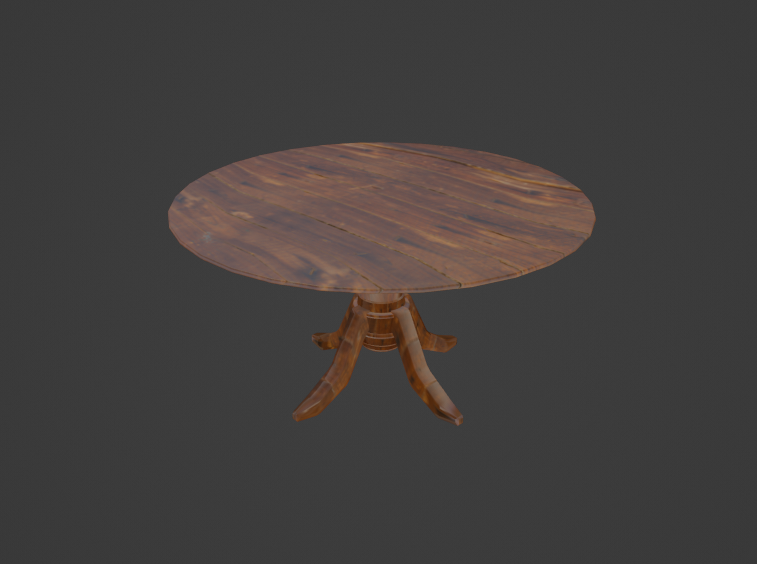
For the dining table, I used the wood texture however I made sure the UVs on the top were spaced out realistically, this was because I didn’t want the player seeing odd, shaped textures on the top of the table as it could possibly break immersion within the game.
Bench
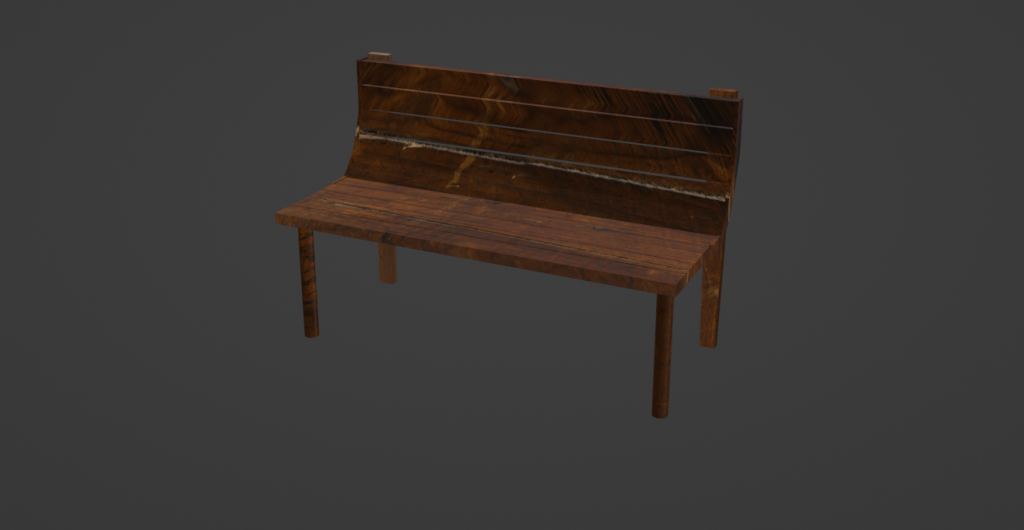
When texturing the bench I used the same wood texture as the other objects.
Chair
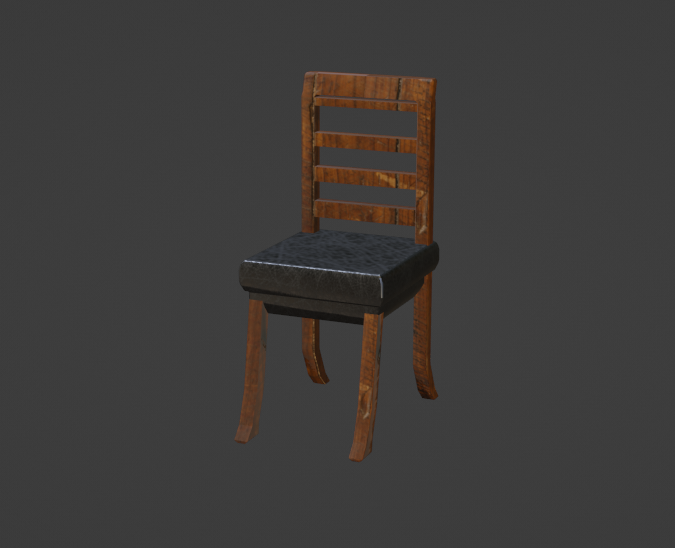
For the chair I used the same wood texture, however I also used a black leather material for the cushion that gets sat on.
Phase 3
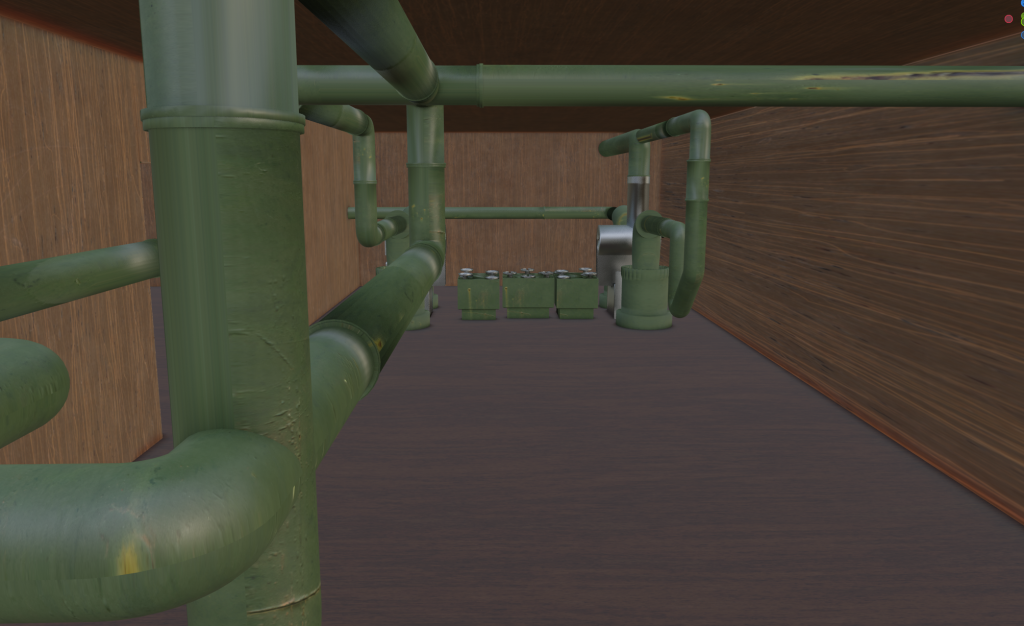
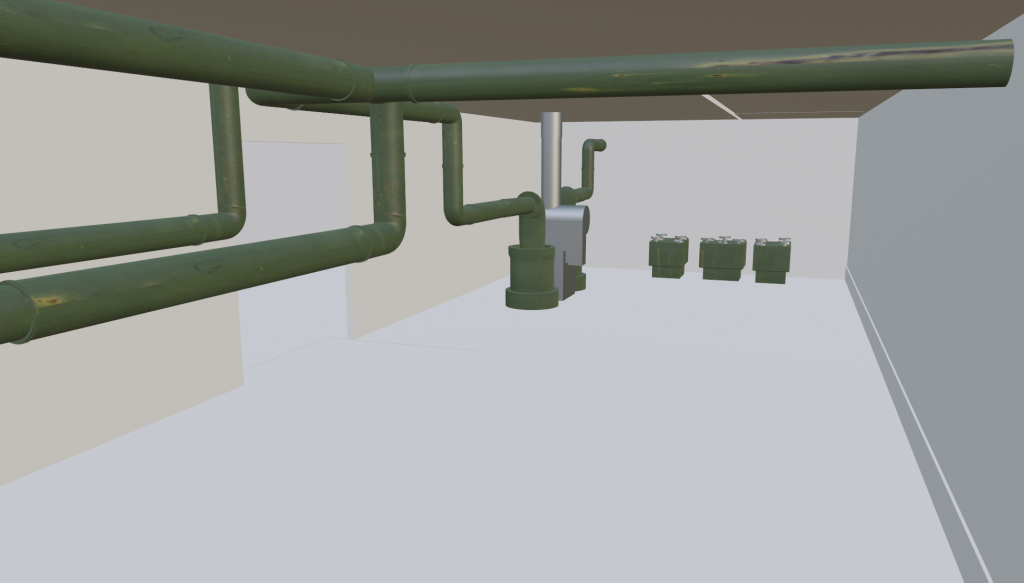
Engine
For the engine i used multiple textures.
The first being a clean metal for the coal compartment, housing area and middle pipe, this is because this can be changed out for new parts from time to time.
The second texture was a rusty green painted metal colour used for the outside pipes, i did this as they have probably been in the ship for a while and may have rusted overtime due to crew negligence.
The final texture is a black outline for the gauge cylinders.
Pipes
For the pipes I did the same textures as the engine for the same reason.
Pistons
For the piston block i used the rusted texture for the box, and clean shiny metal for the pistons.
Trays
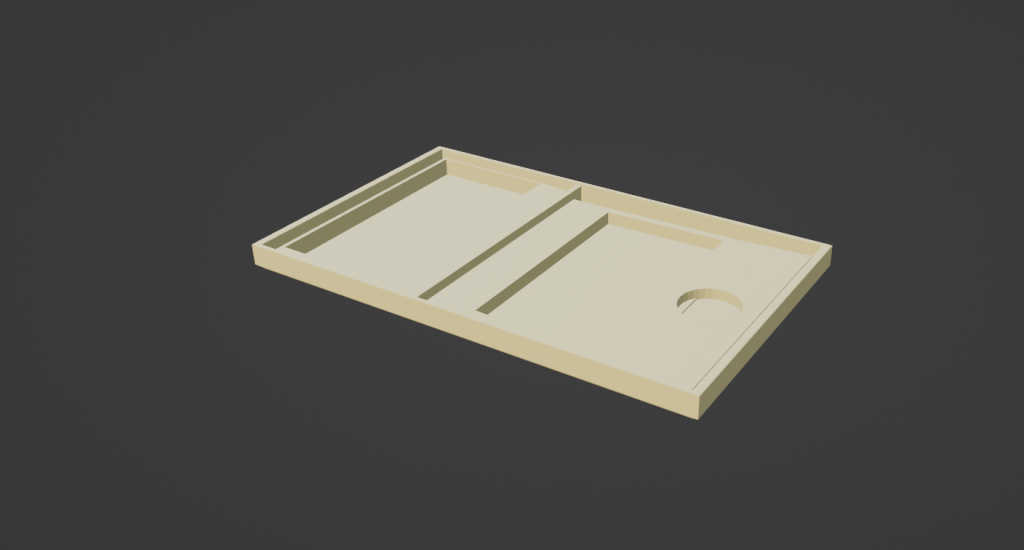
For the tray I used a yellowish off-white colour, this is because I wanted it to look like Bakelite which was one of the most used plastics at the time.
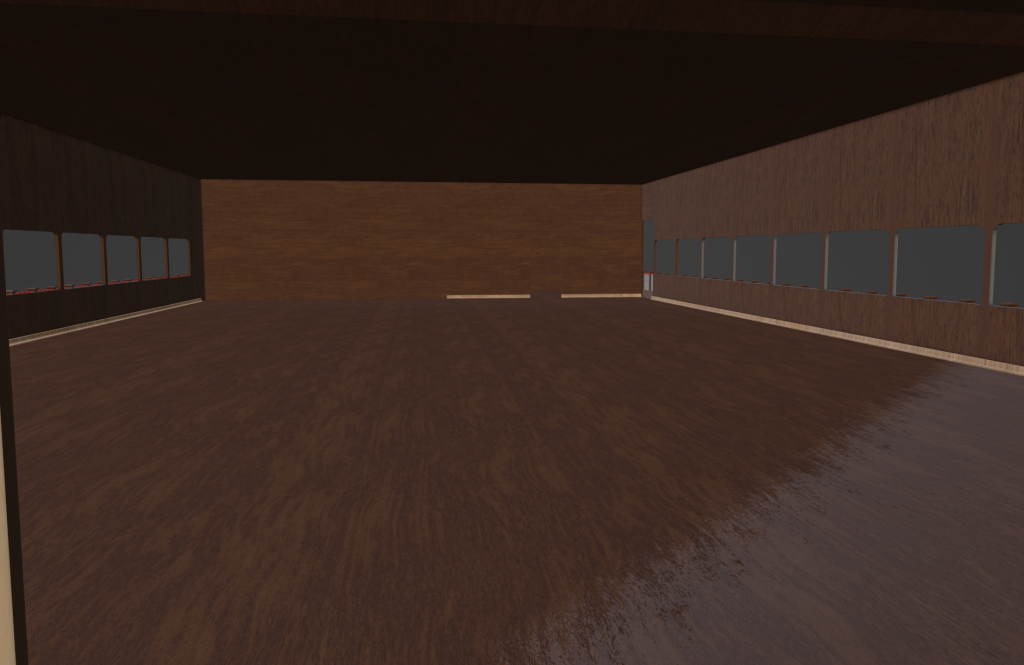
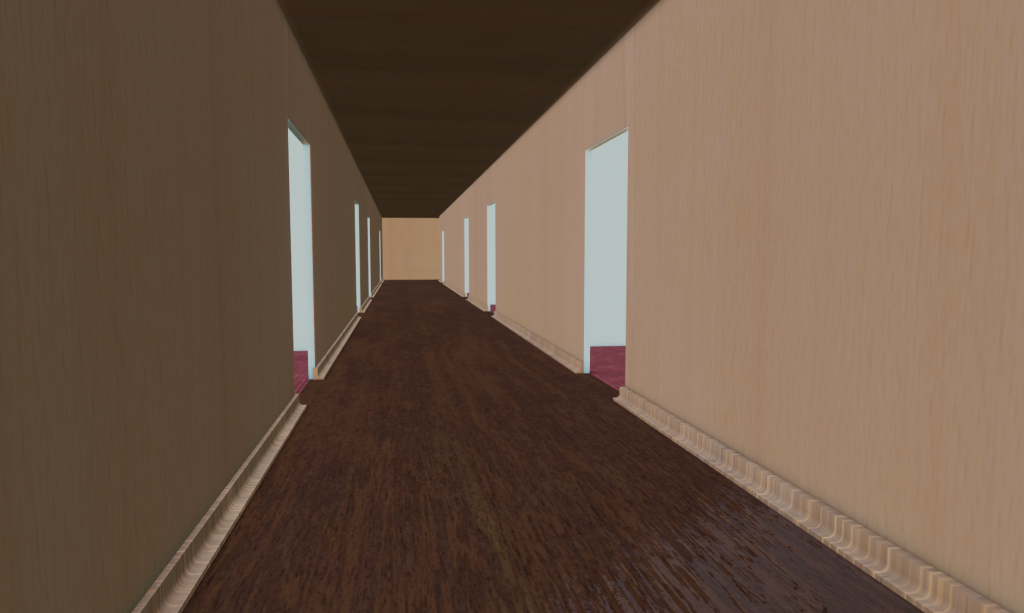
Boat
For the boat I used many textures, these being dark oak wood, painted red wood for the paddle, metal for pipes, wallpaper for inside of rooms, carpets for downstairs floors and much more.
Below are some images of different areas that are textured.
In this blog post I will run through all of the phase 2 assets that I was tasked with making for major project.
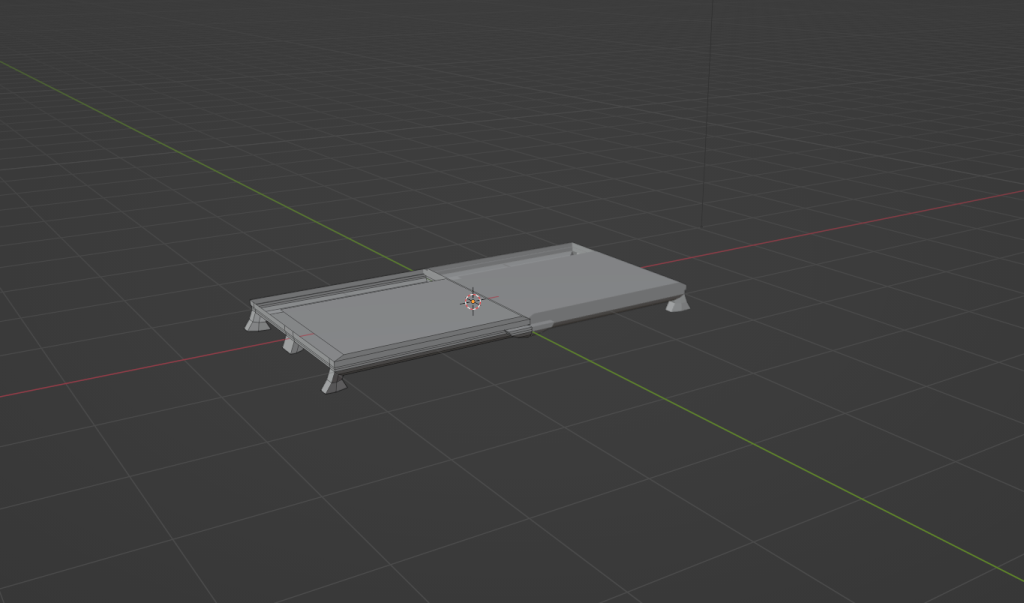
Kitchen table
When starting my kitchen table asset, I began by making legs for the table, I used cylinders which I extruded and shaped.
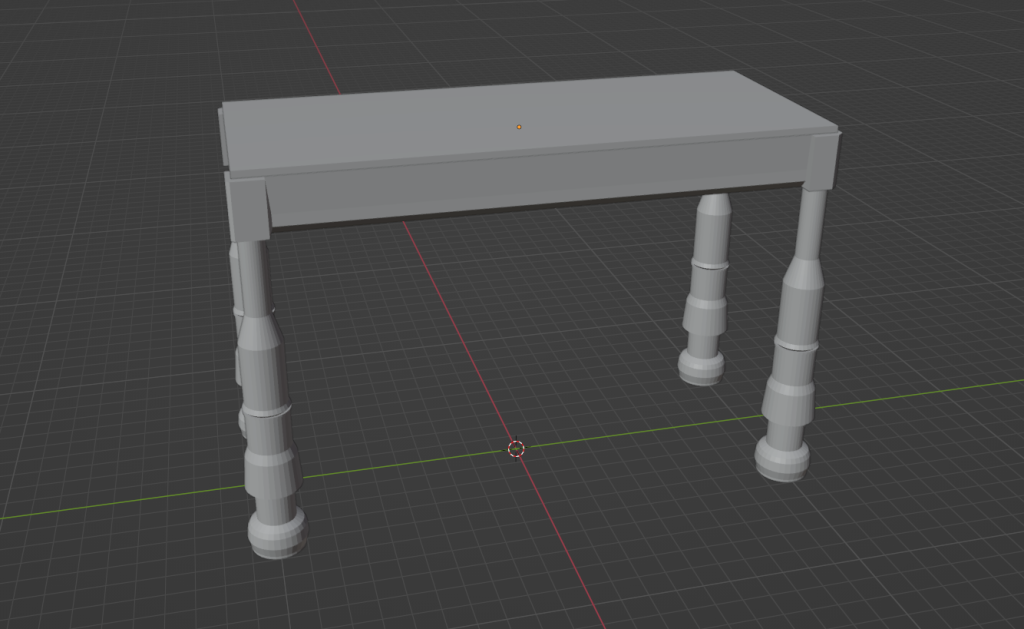
I then created the body of the table. This is simply just a cube which I insetted underneath and brought the underneath face upwards.
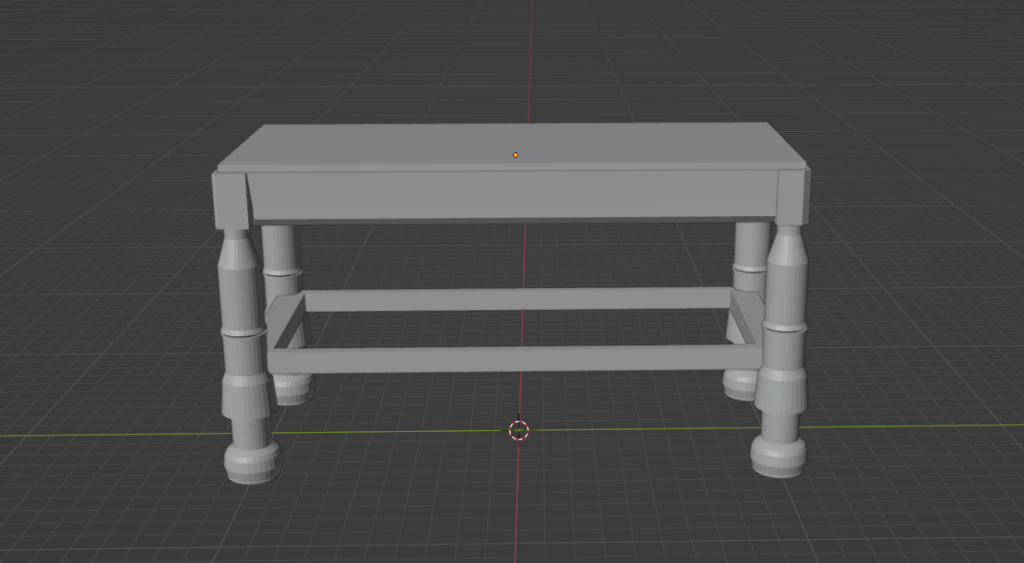
I then added a cube onto the legs which I insetted and deleted the faces, I did this because I thought the table had a lot of empty space which was underutilized and I think that having the this makes the table look better.
Chair
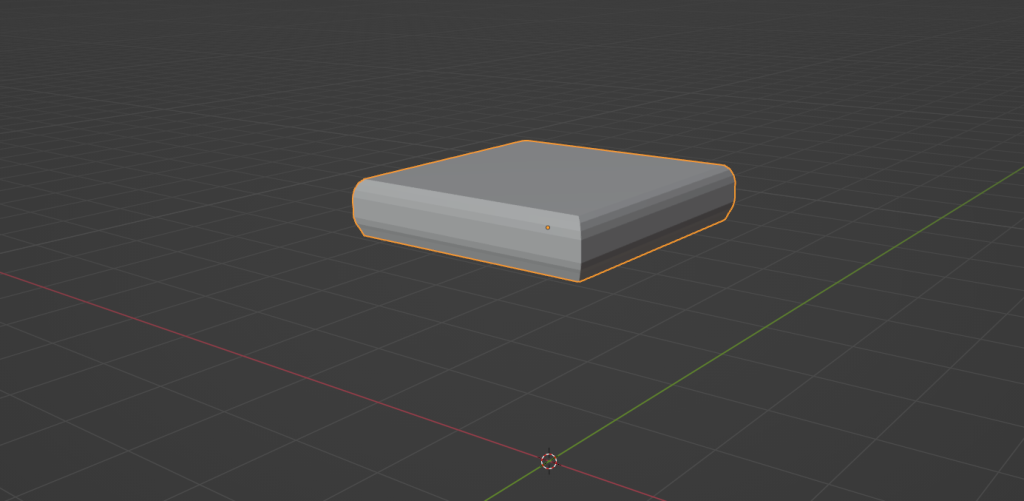
To start the chair, I added a cube which I beveled, this created the cushion which will be sat on.
I then created the legs for the chairs via cubes.
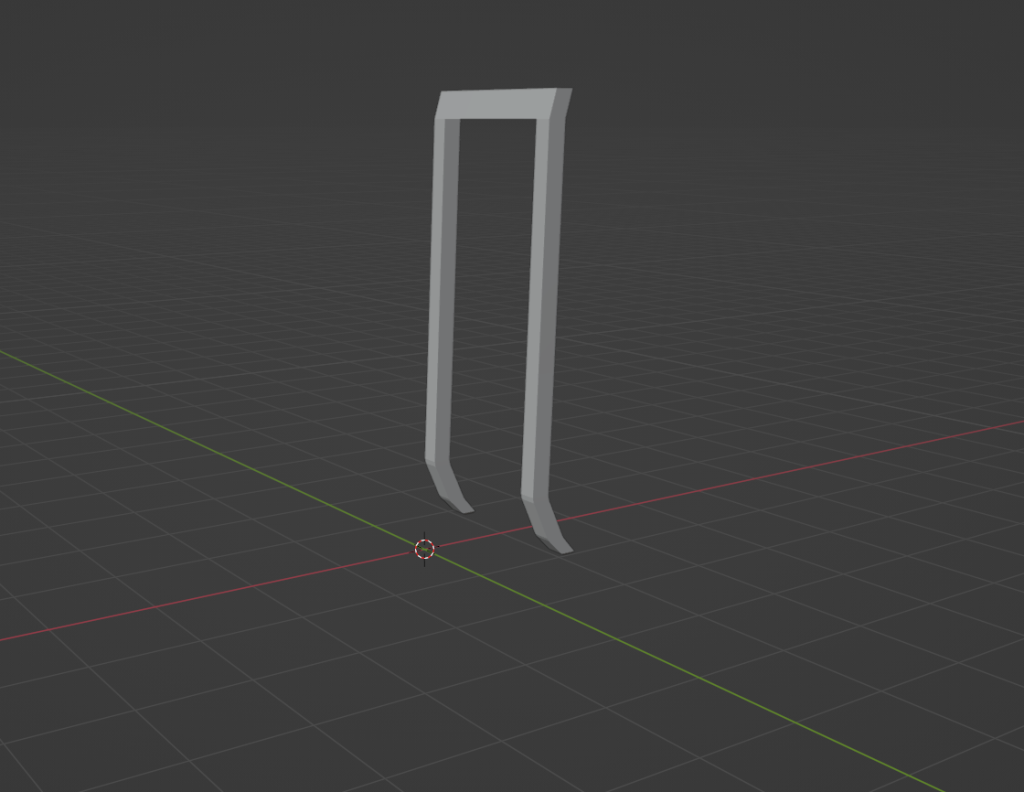
I used the same thing I did for the legs for the back of the chair.
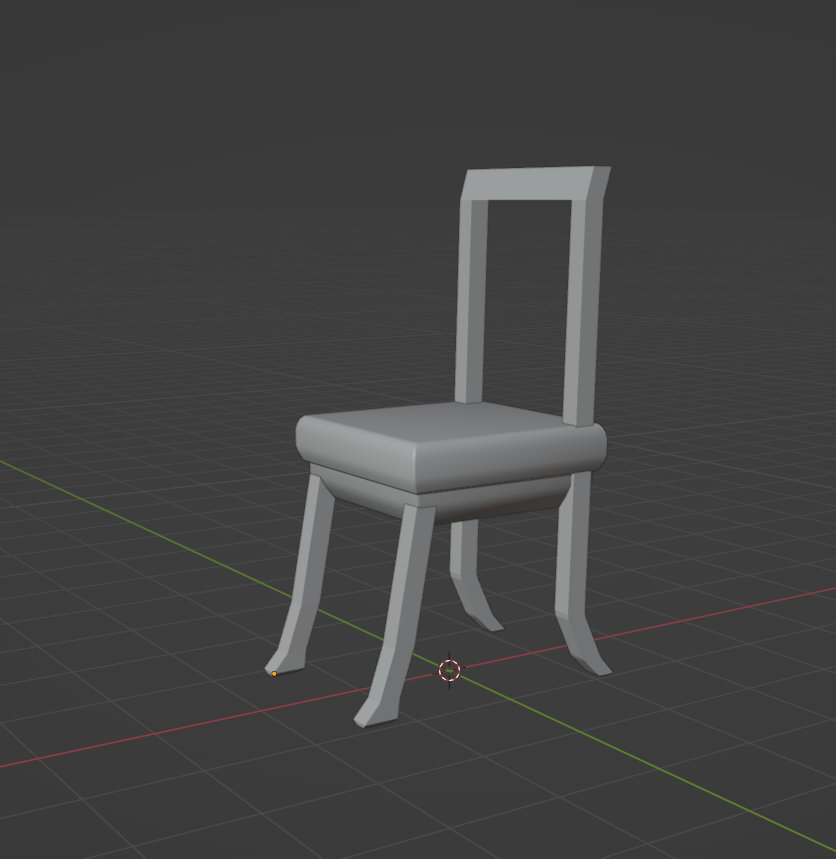
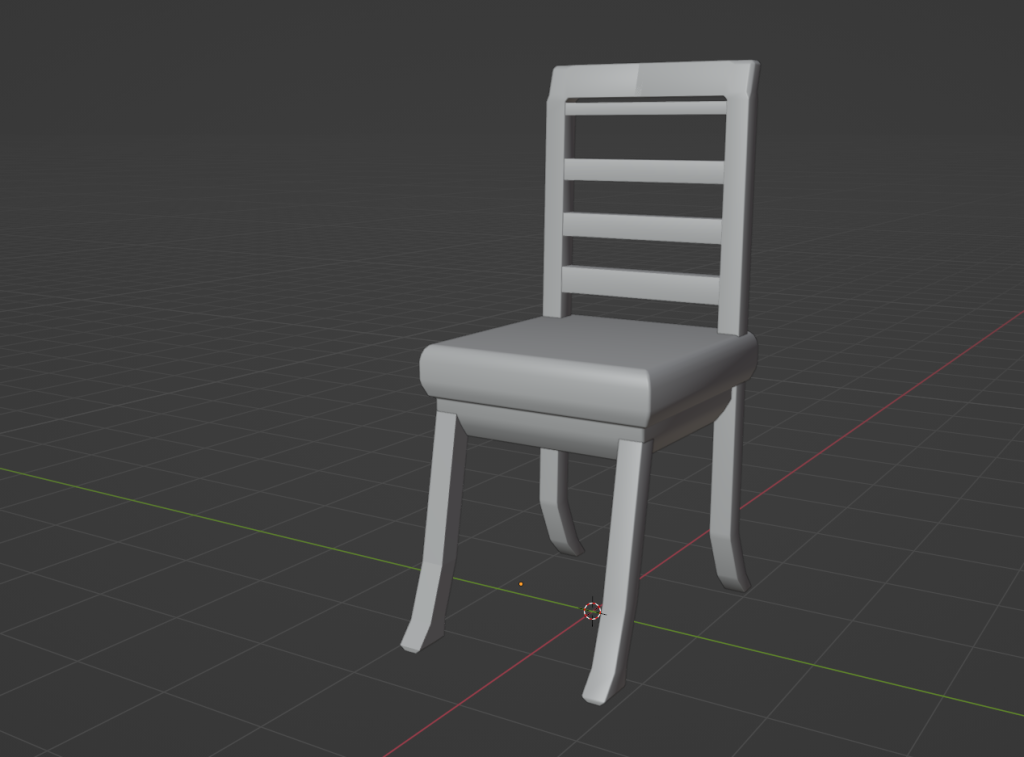
Finally I added cubes across the back of the chair so that it looks realistic to a chair in real life.
Bench
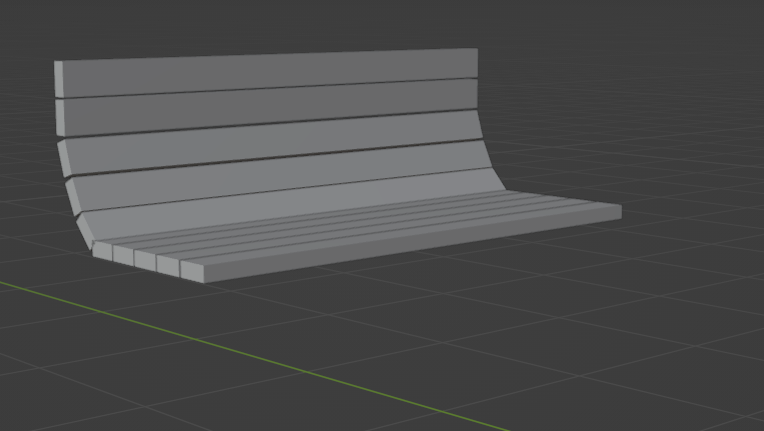
When creating my bench, I firstly modelled the individual planks of the bench, I did this instead of a curved single object with a texture on it as in my opinion it works better when making it just like how it is made in real life, than faking it.
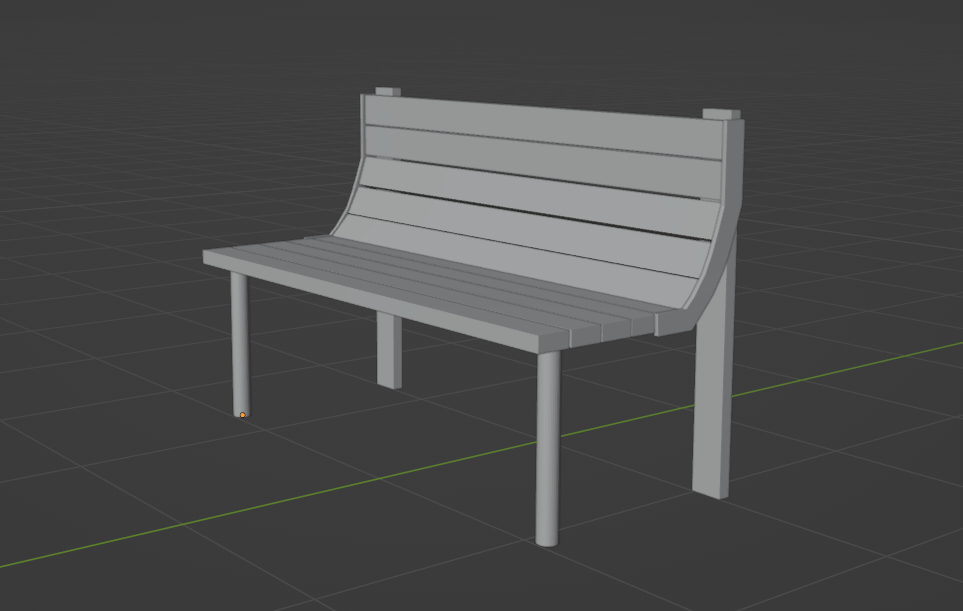
Once I made the planks I added sides to the planks and also legs.
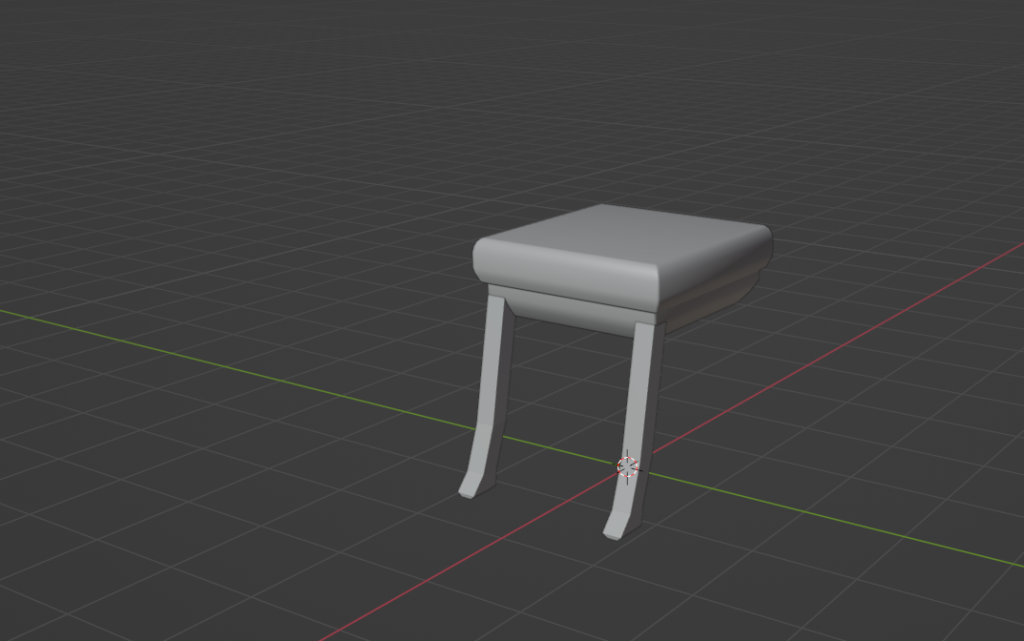
Sitting Chair
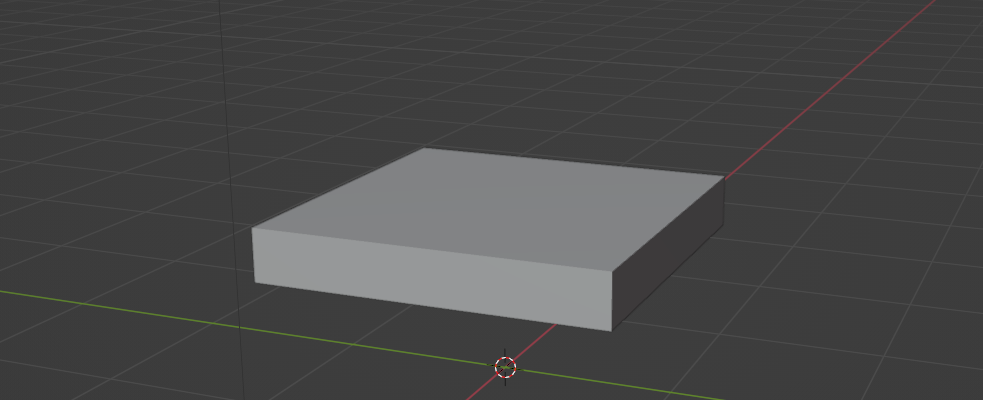
I began modelling the sitting chair by creating the cushion that is sat on.
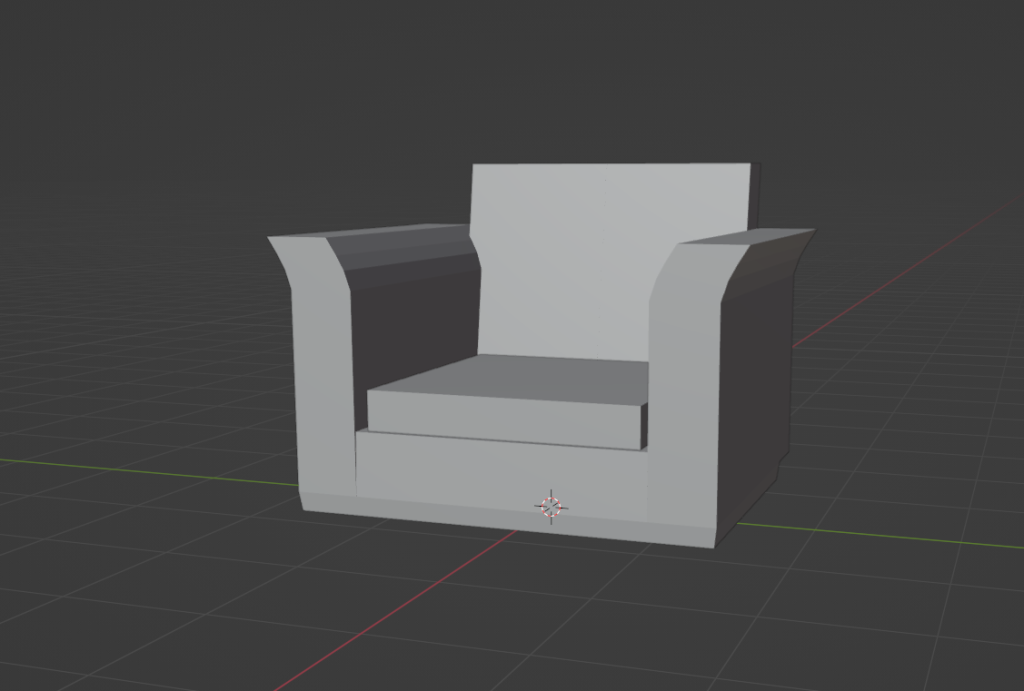
I then created a rough design of the sitting chair by using a mirrored cube so that the design on both sides would be the same.
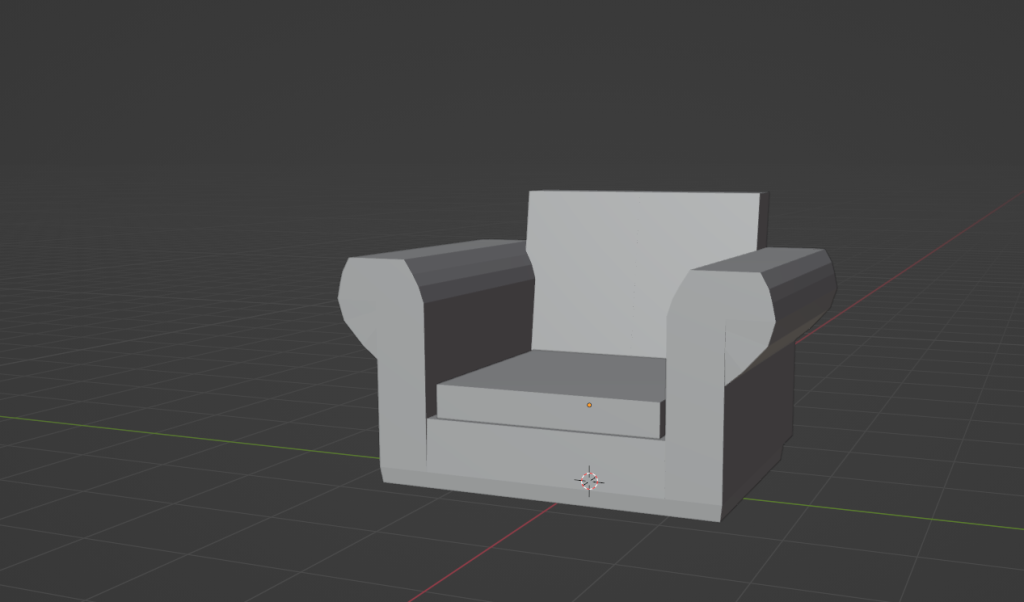
Once the initial idea of the chair was laid out I began beveling certain parts to create a curved surface.
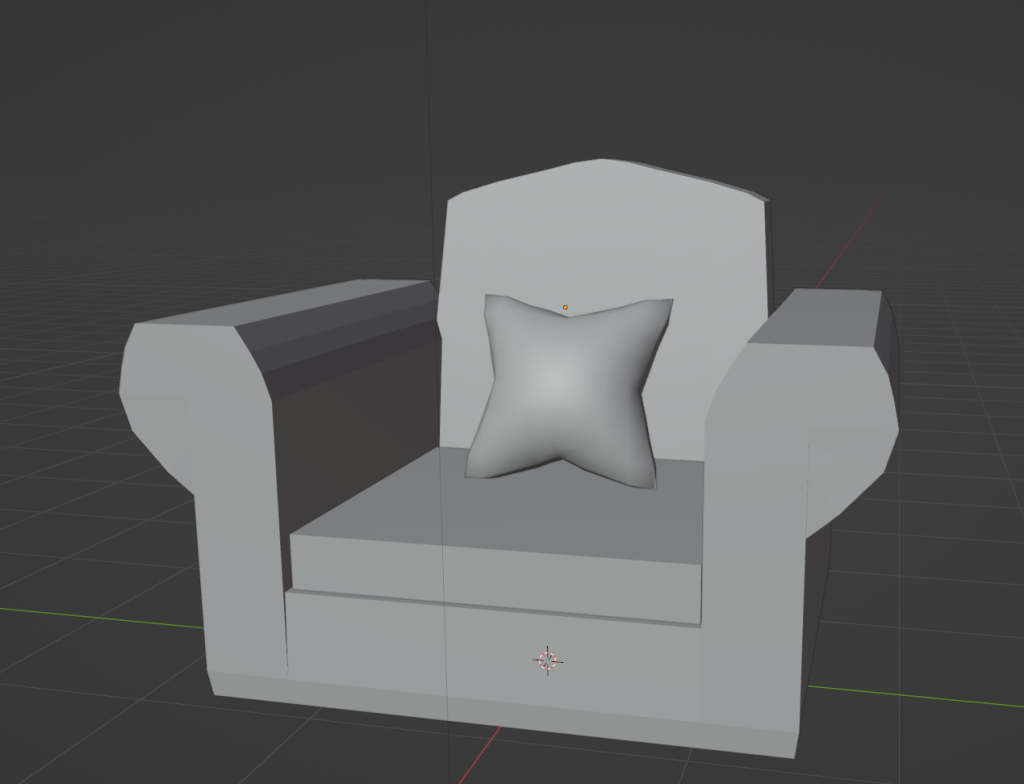
I then beveled the top of my chair, and also created a pillow, i made this by creating a cube, subdividing it, extruding the middle vertices along the y-axis and then turning it into a cloth sim.
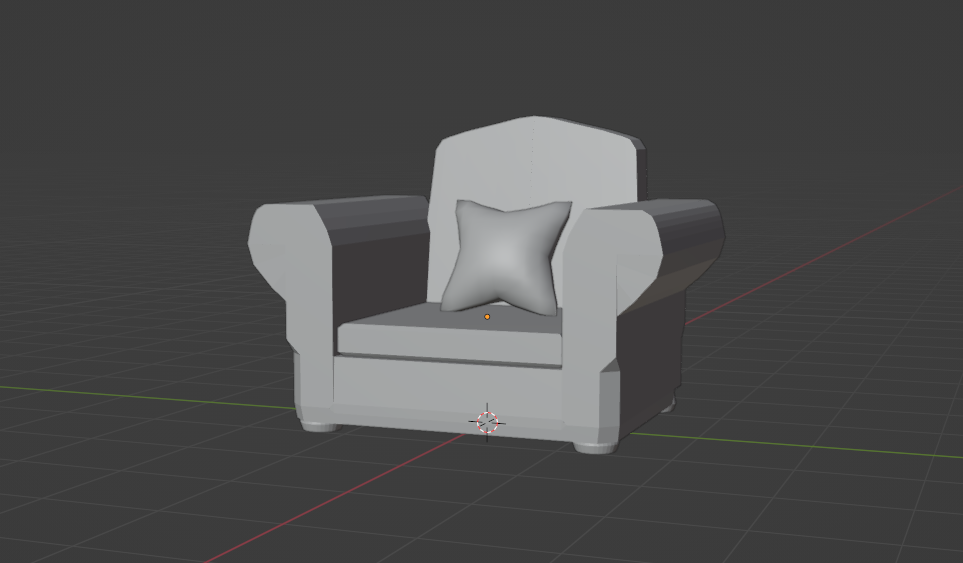
To finish off the model I created legs and attached them to the body of the sitting chair.
Fruit Bowl
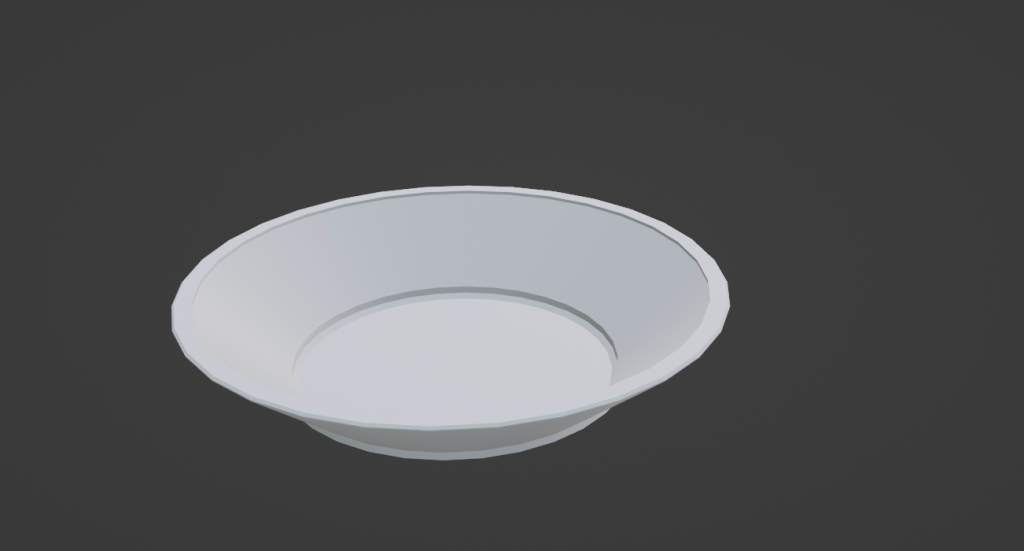
To create the fruit bowl it was quite simple, firstly I added a circle and extruded it upwards, I then beveled it and then extruded upwards and out to create the dip in the bowl.
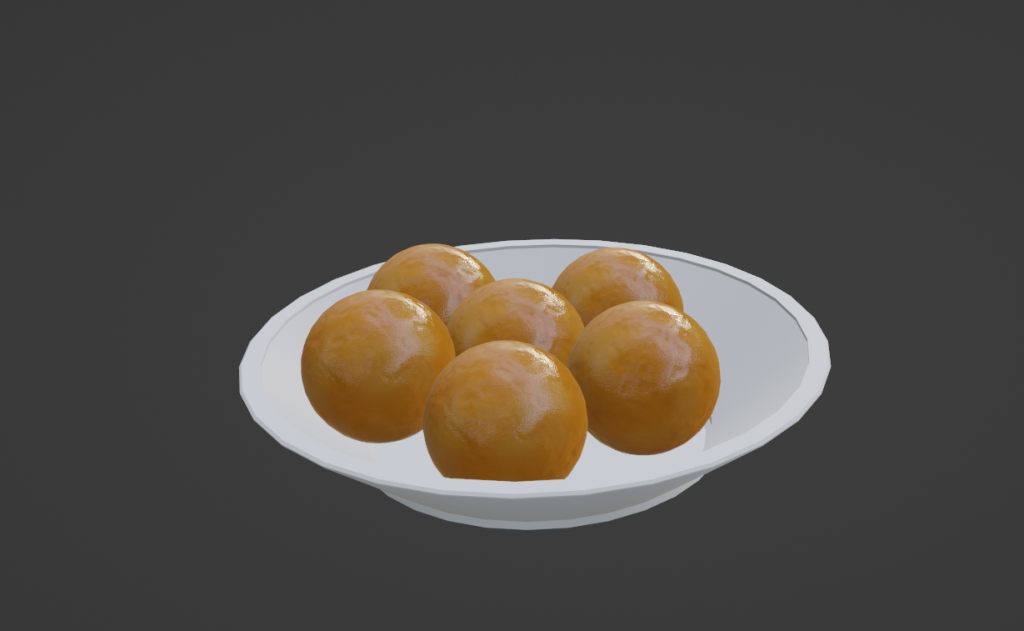
To create the oranges in the bowl, I used UV spheres which I subdivided and added a displacement modifier to it to add roughness which isn’t related to the texture of the fruit. I then added an orange colour to it
Dining room table
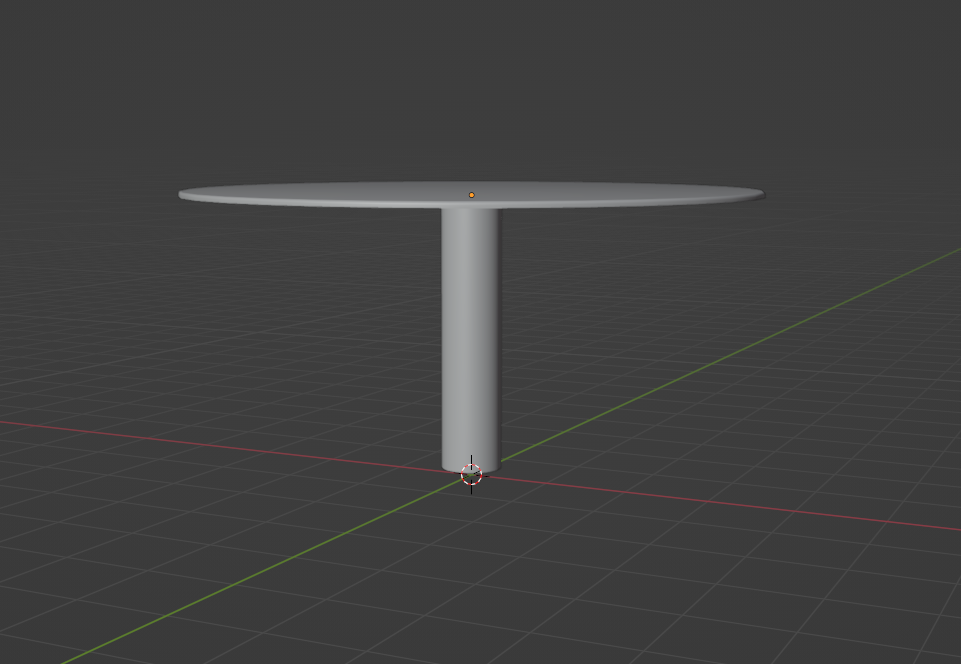
To begin my dining room table I added a cylinder which I extruded upwards and then extruded out to create the table surface at the top.
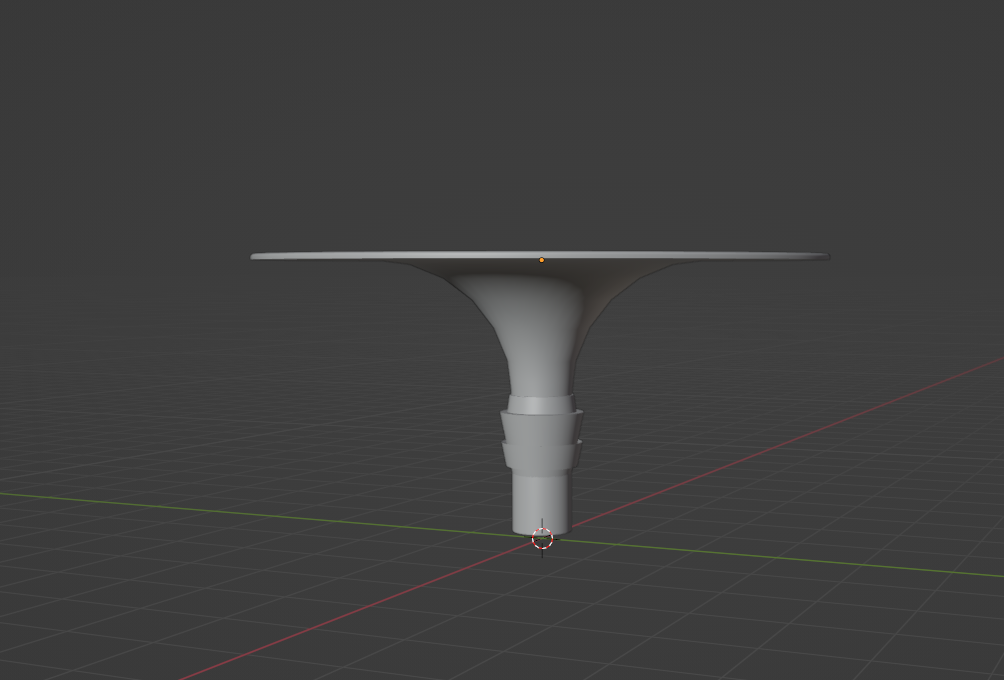
I then beveled the table from the main surface to the cylinder going downwards, and added a couple of faces that were extruded outwards to create a non flat design.
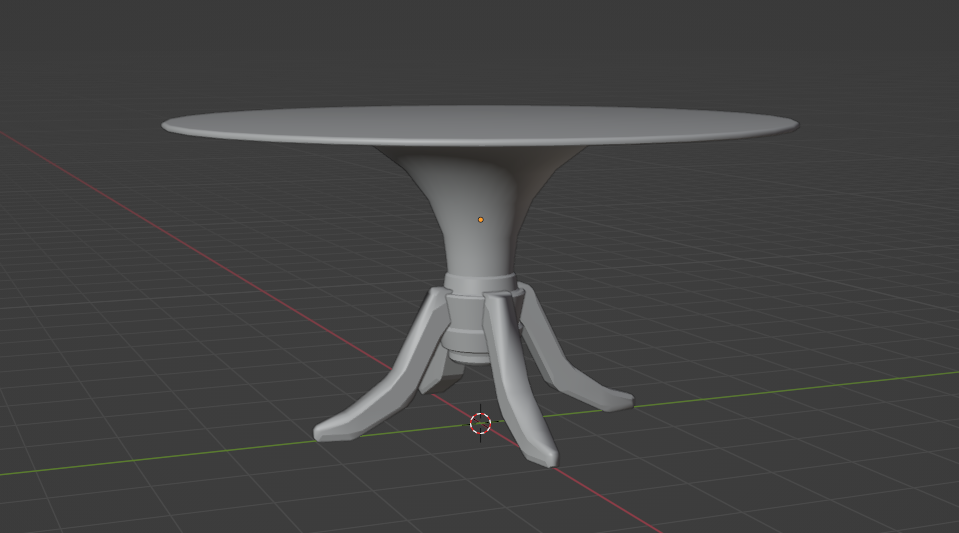
Finally i added legs to the table which i mirrored along the x and y axis
In this blog post I will run through how I made all of the phase 1 assets that I was tasked with making for the major project.
Wardrobe
When I started out creating the wardrobe asset, I began by making a base to the wardrobe with 6 legs, I did this to get the rough layout of the asset, before continuing on with it.
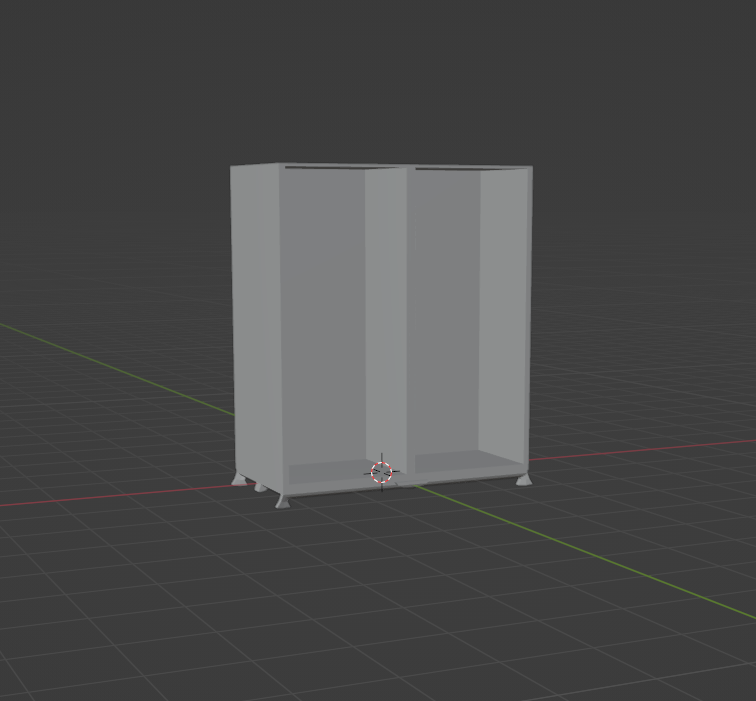
After the base was complete, I then moved onto the body of the wardrobe, all I did for this was extruding the faces upwards to create the back, side and top of the wardrobe. I then created the partition in the middle of the wardrobe which splits both sides of the wardrobe apart for 2 separate areas to put in clothes.
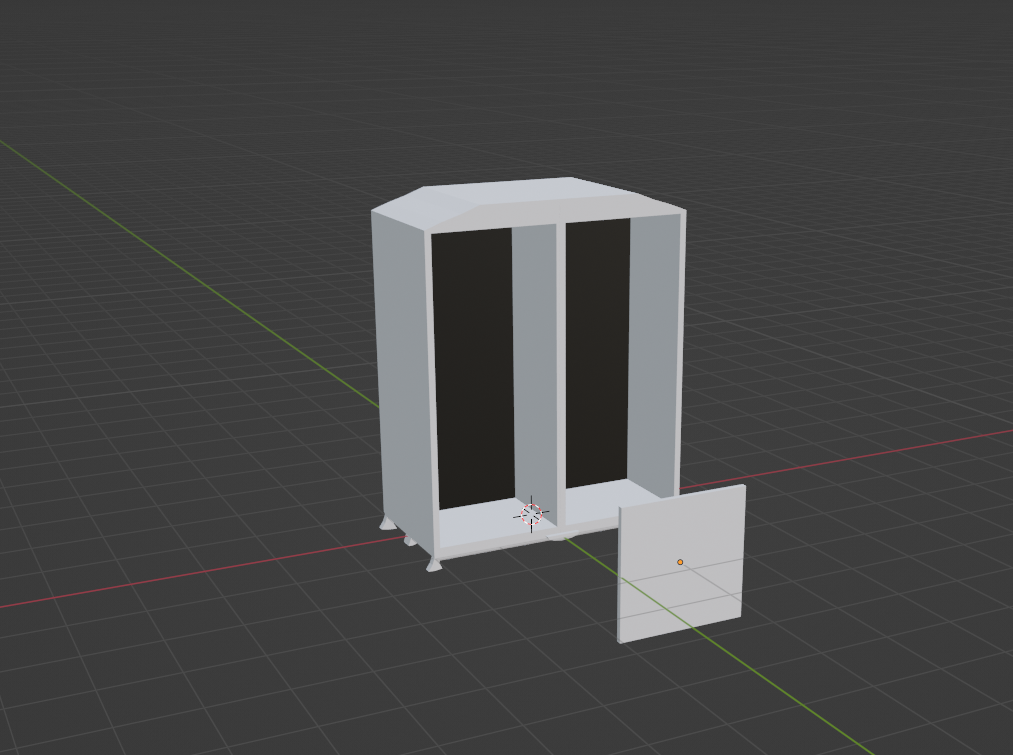
I moved onto the roof and doors next, firstly I made the roof of the wardrobe slanted so that it wasn’t a simple 90 degree turn which looks unflattering,
After I finished the roof I then moved onto the doors which were simple cubes which I copied and put on either side of the wardrobe, I also created a door handle for it by adding a cylinder to the scene, changing its rotation, beveling/extruding certain parts to create a door handle shape.
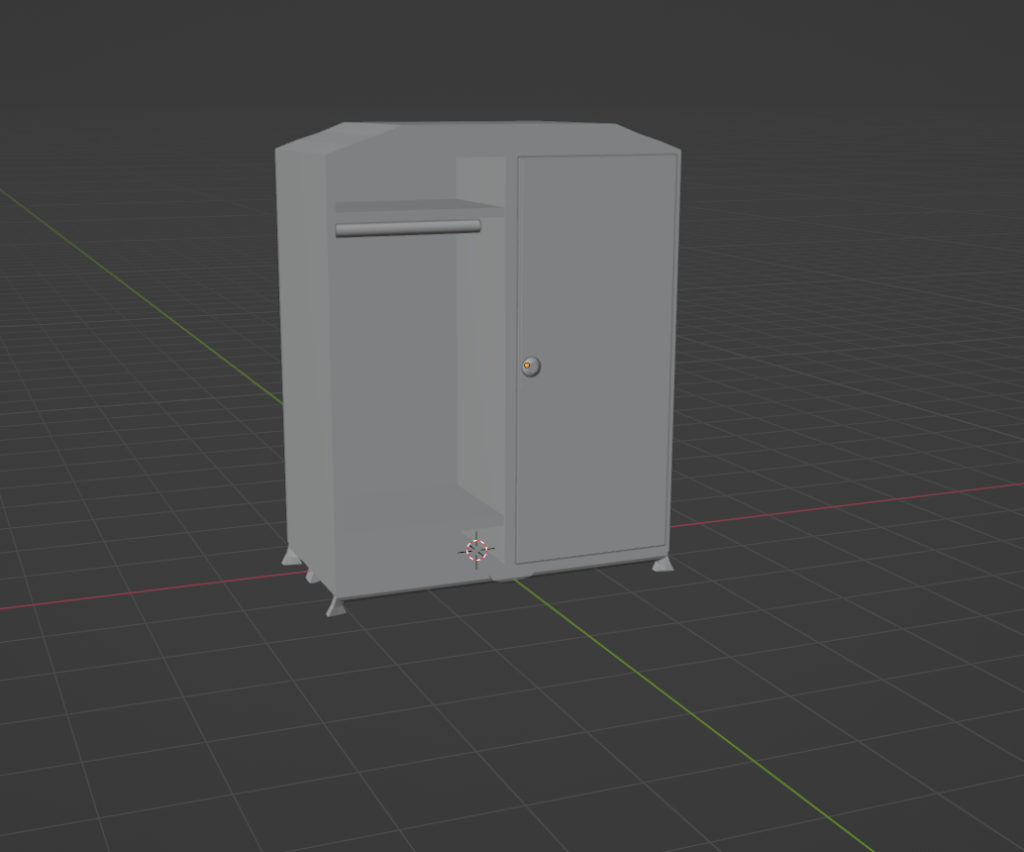
Once I created the door handle, I then moved onto the final touches, first being the inside the the wardrobe, I decided to add a shelf to the bottom and the top of each partition, I also added a clothes rail which can house coat hangers with clothes on it.
The final touches of the wardrobe consisted of checking that all the geometry was good and didn’t have any problems and also making sure the doors pivot points were in the middle on the side so that when exported into unreal, it will be able to open like a normal wardrobe door.
Sink
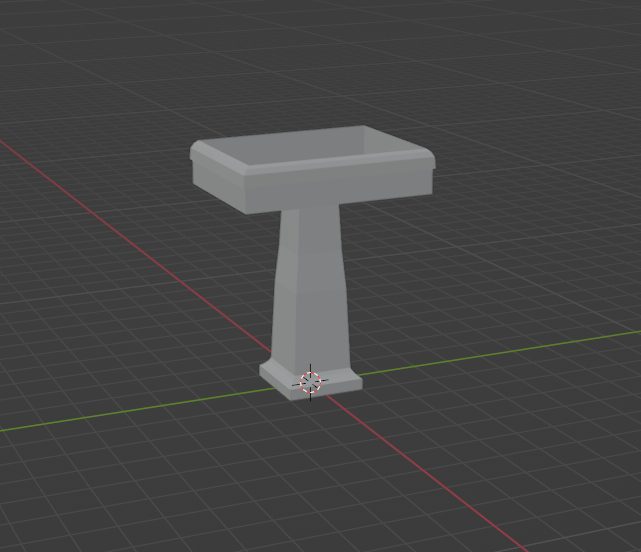
When creating the base for my sink, I looked at many designs of sinks from the 1910s/1920s, these gave me the general idea of what I was creating and assisted me in production.
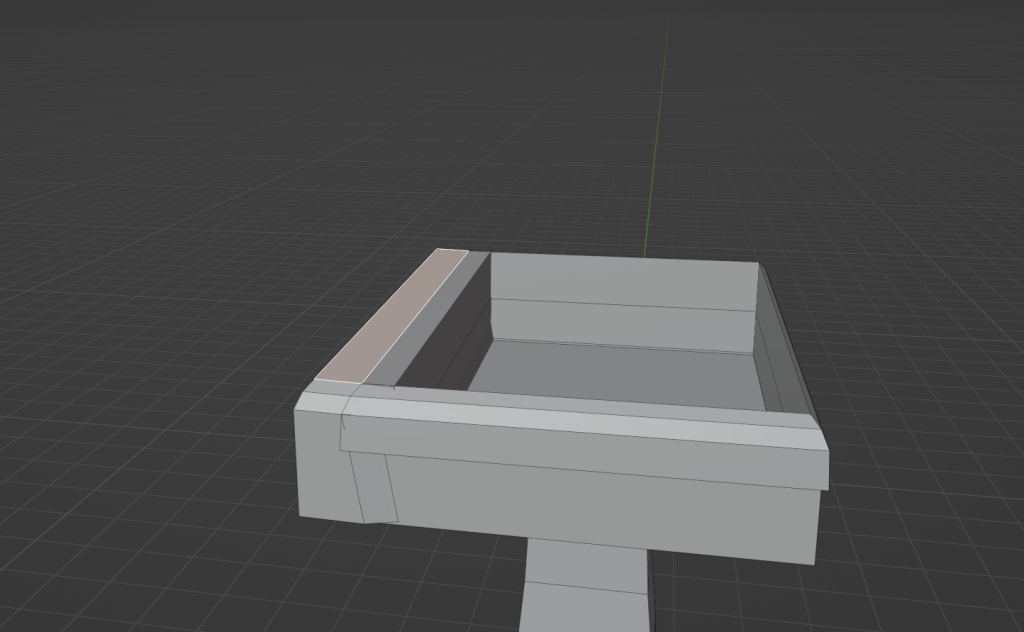
After the base model was complete, I continued on with the model and added detail to it, I started by adding a ledge to the back of the sink.

After I created the ledge, I then added the drain in the middle of the basin.
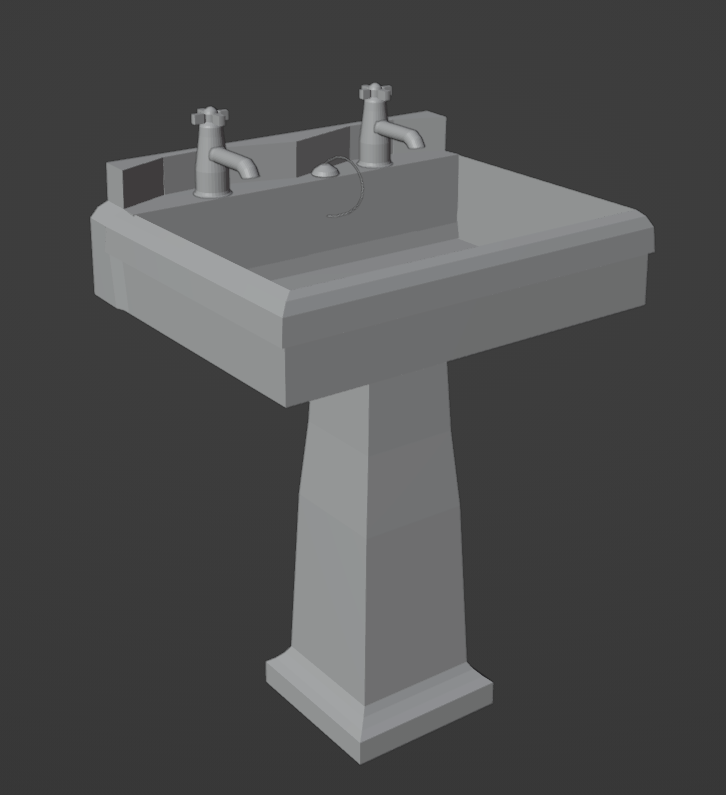
Finally I created both the taps for the sink as well as the plug
Snub Revolver
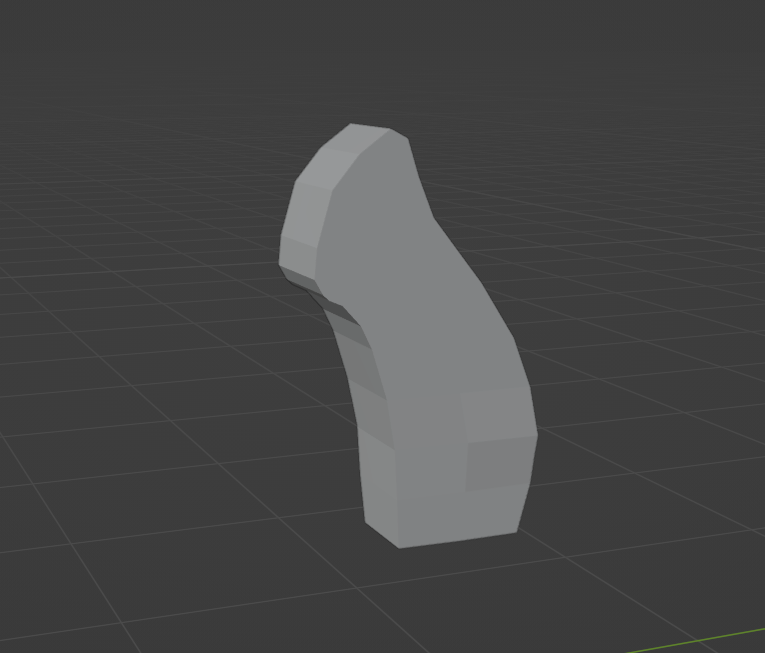
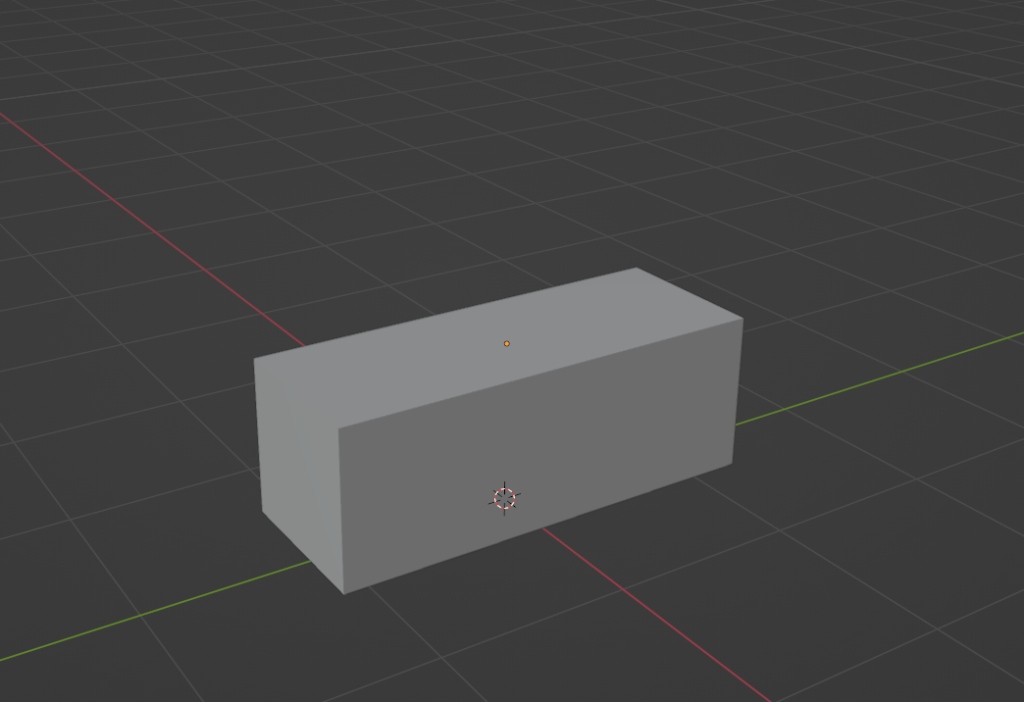
To begin creating the revolver, I started by making the grip of the gun I did this by using a plane which I shrunk and extruded in the shape of a grip.
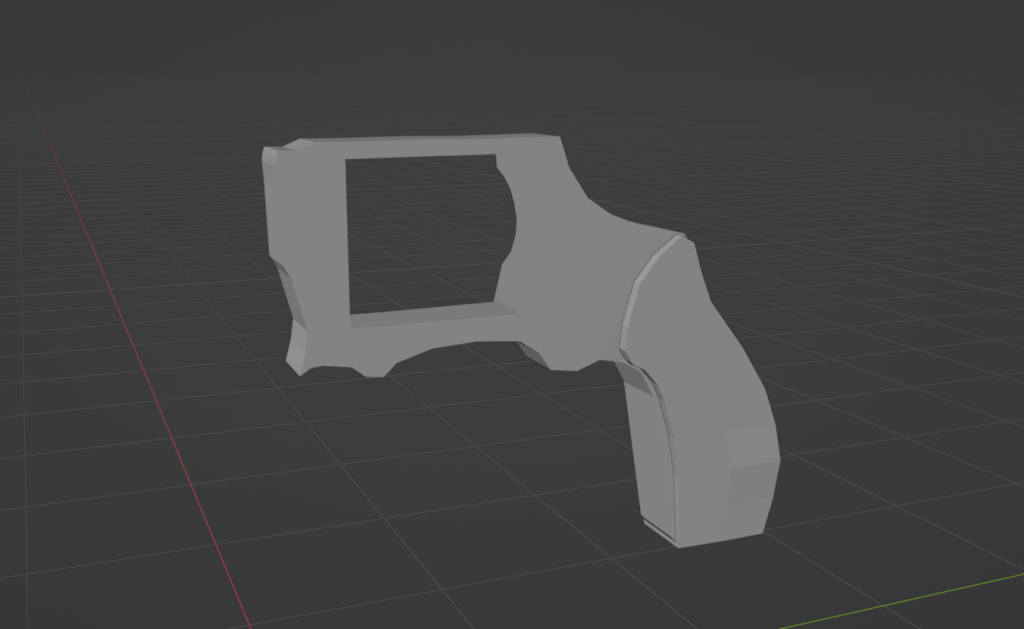
I then moved onto the body of the gun which I used the same technique for, however I created it as a solid block but used the knife tool to cut out the middle where the cylinder of the revolver lives.
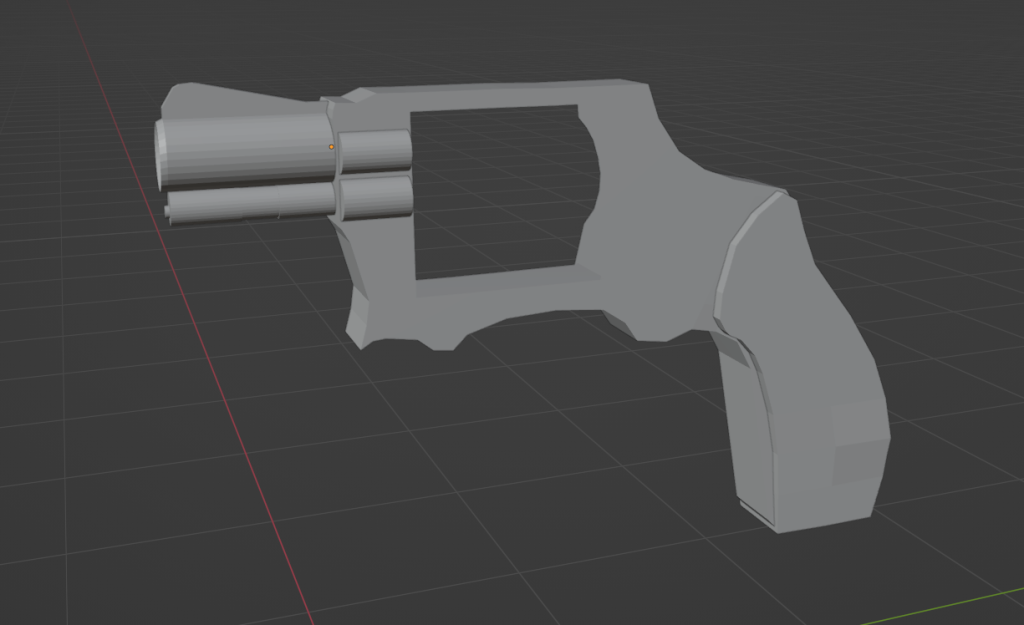
Once I finished the body of the revolver I moved onto the barrel which was 4 cylinders. Firstly I created the two cylinders on the front of the gun and then the two half cylinders on the side which I sliced in half and mirrored it onto the body of the gun next to the barrel.
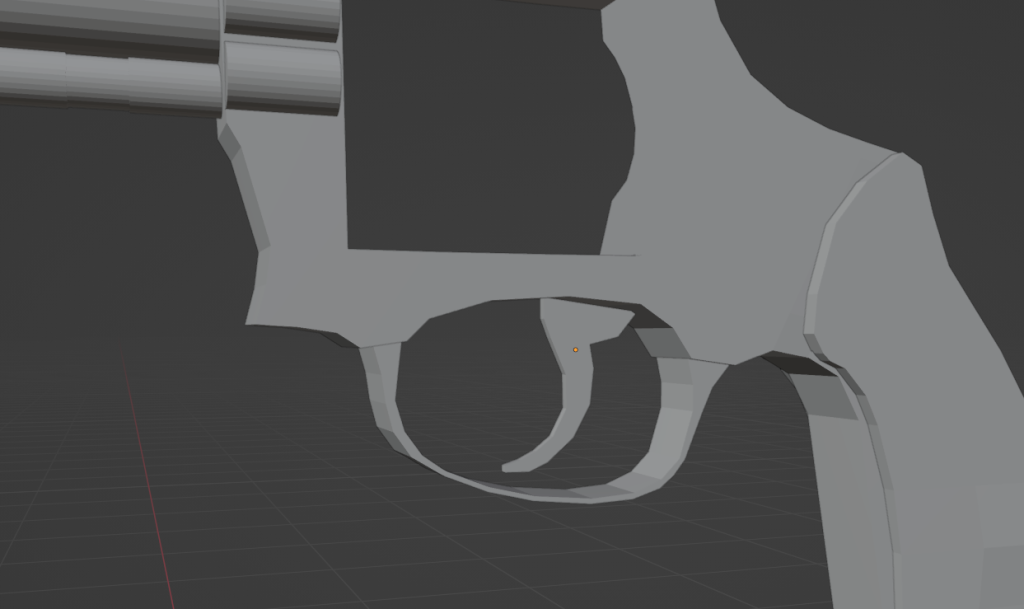
I then created the trigger and trigger guard, I used 2 cubes for this and extruded them to create the appropriate shape of the objects.
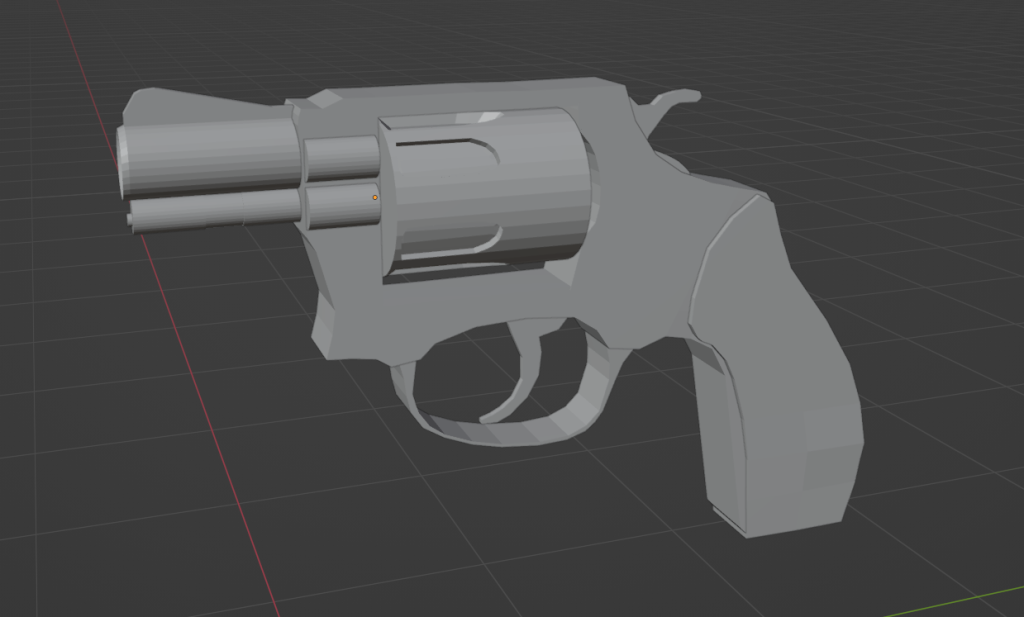
I finally moved onto the cylinder of the gun which I used a simple cylinder for which I then cut shapes into to make it look like a real revolver, I then created the hammer of the revolver and put it on the back of the body.
Bathtub
I started the bathtub by adding a cube to the scene and extruding it along the y-axis to make it longer.
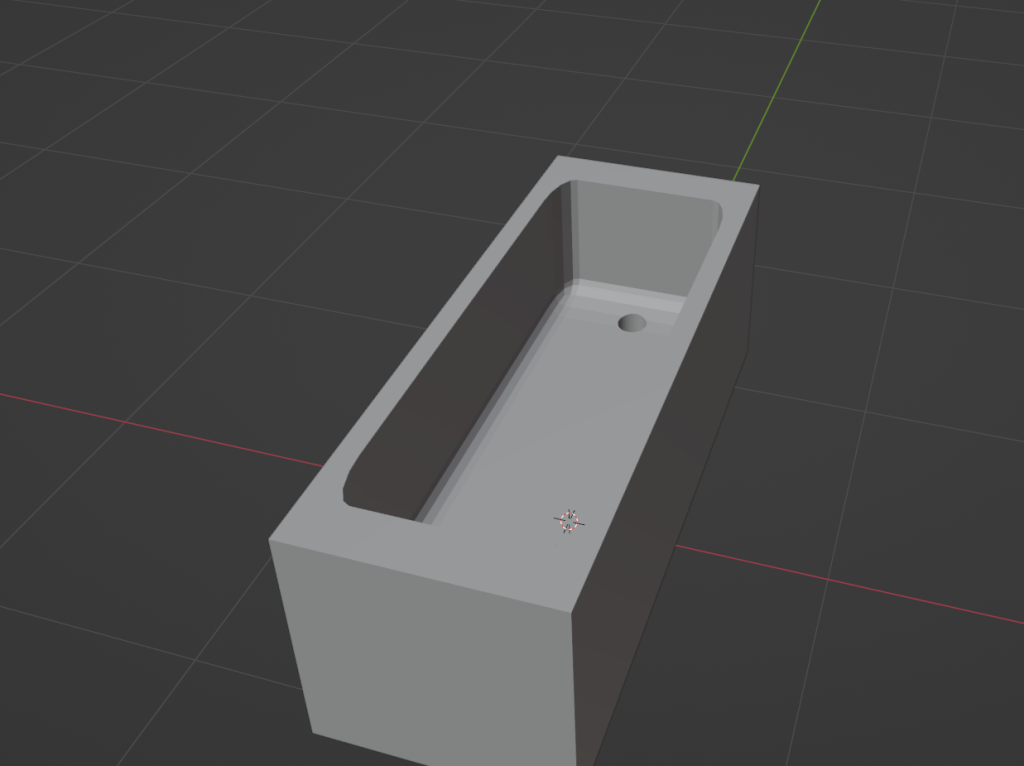
Once I got the basic shape down I added a high poly rounded cube and booleaned it so that i could cut the exact shape of the rounded cube into the top of the standard cube.
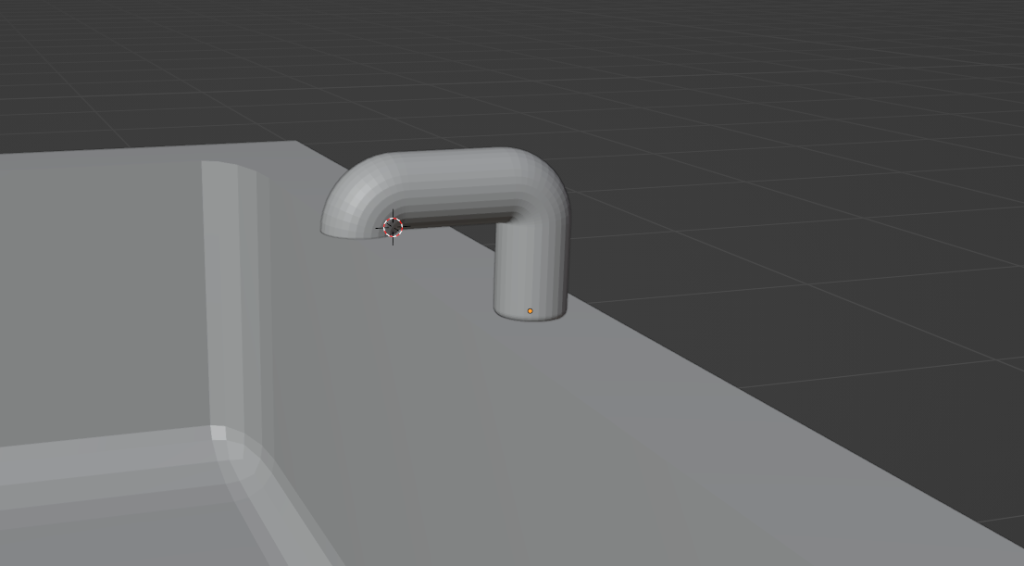
Once I did that I added the tap to the body of the bath, I did this by using the spin tool on the cylinder to extrude it in a curve to create the look of a bend in pipe/metal.

Finally I added faucets to the tap and rounded off the sides of the bath.
Toilet

When beginning to make my toilet asset, I started by adding a cube and a cylinder to an extruded base plane. I then extruded these up in the rough direction which a 1910s/20s toilet would be in.
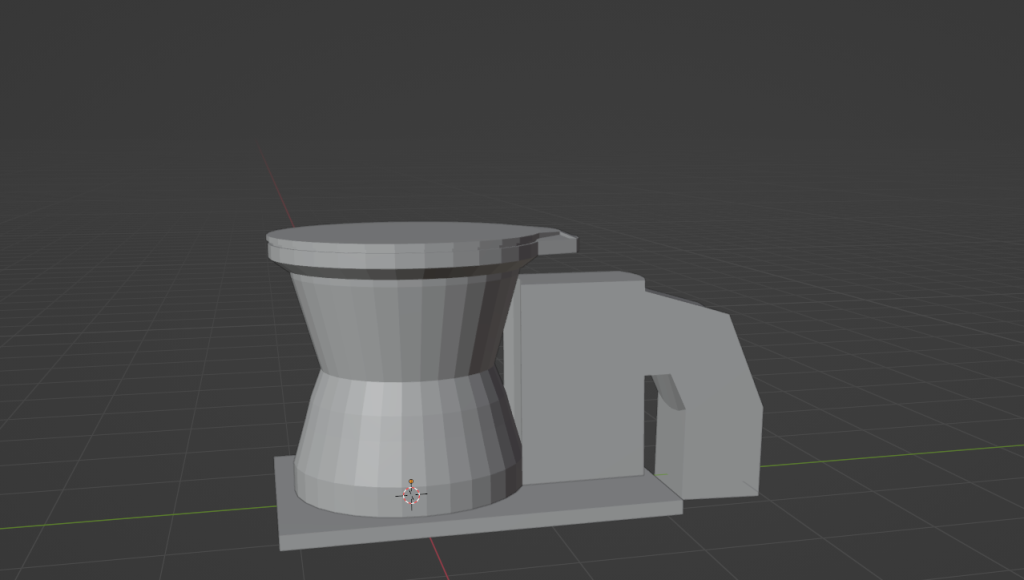
After this I added the toilet bowl on top of the base of the toilet.
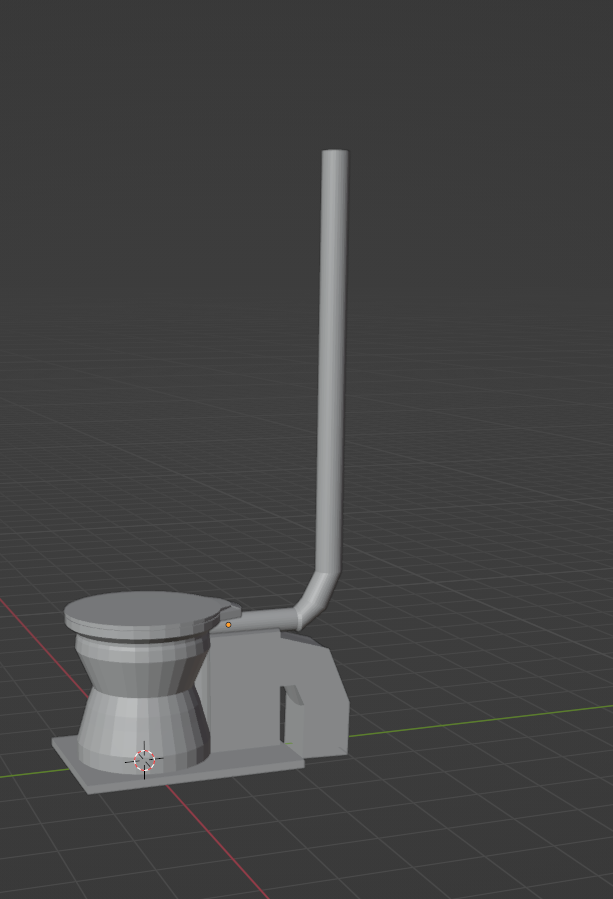
Once I created the bowl and lid of the toilet, I created the pipe which goes to the box connected to the wall.
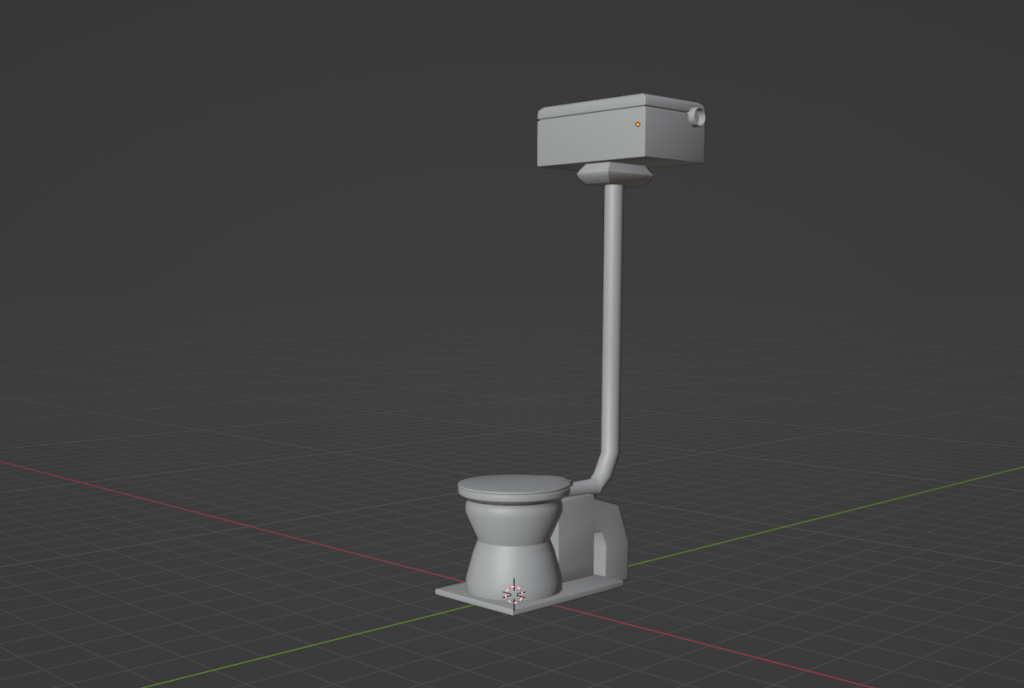
Finally I created the toilet box and also the chain which is on the side of the box so that it is flushable.
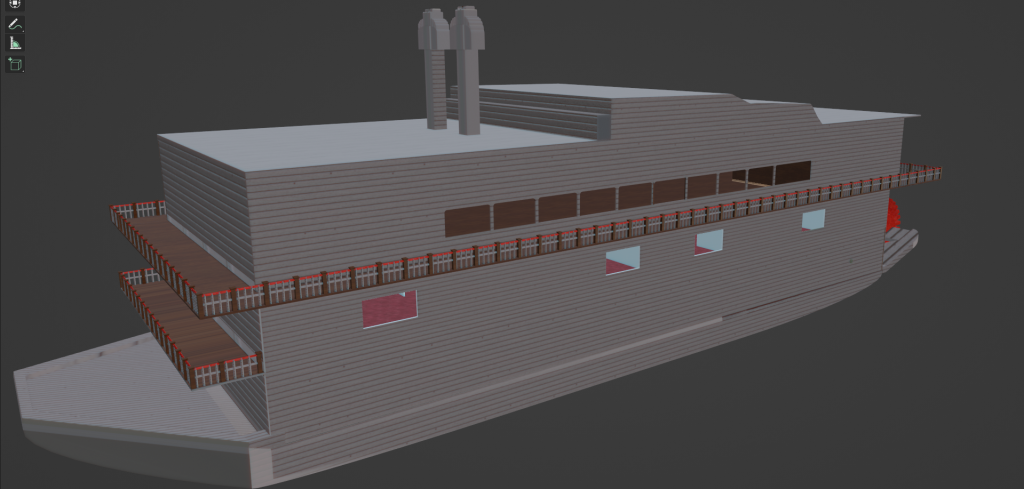
SS Arctic
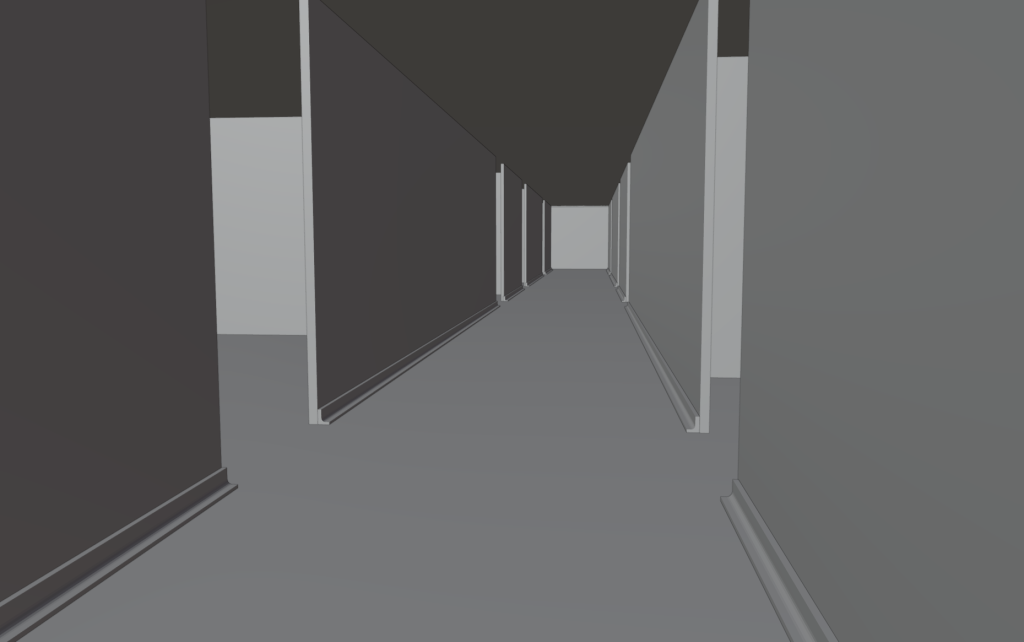
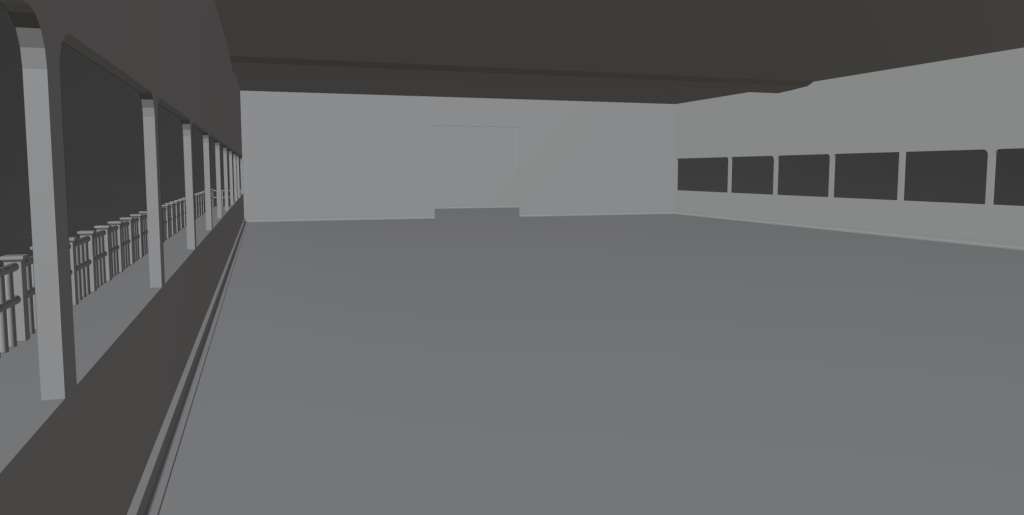
To begin with, I added skirting boards around the bases of walls. I did this to stop there being a perfect 90-degree angle where the floor meets the wall.
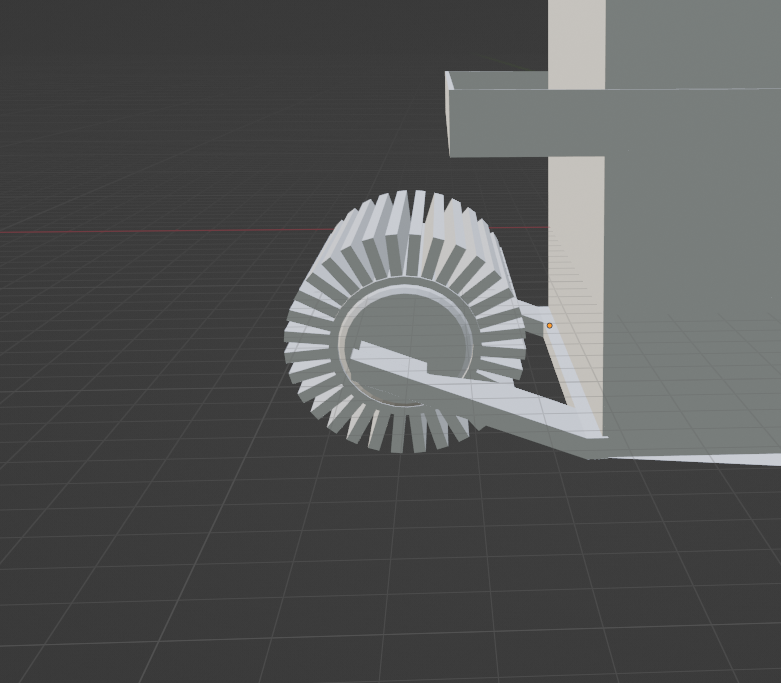
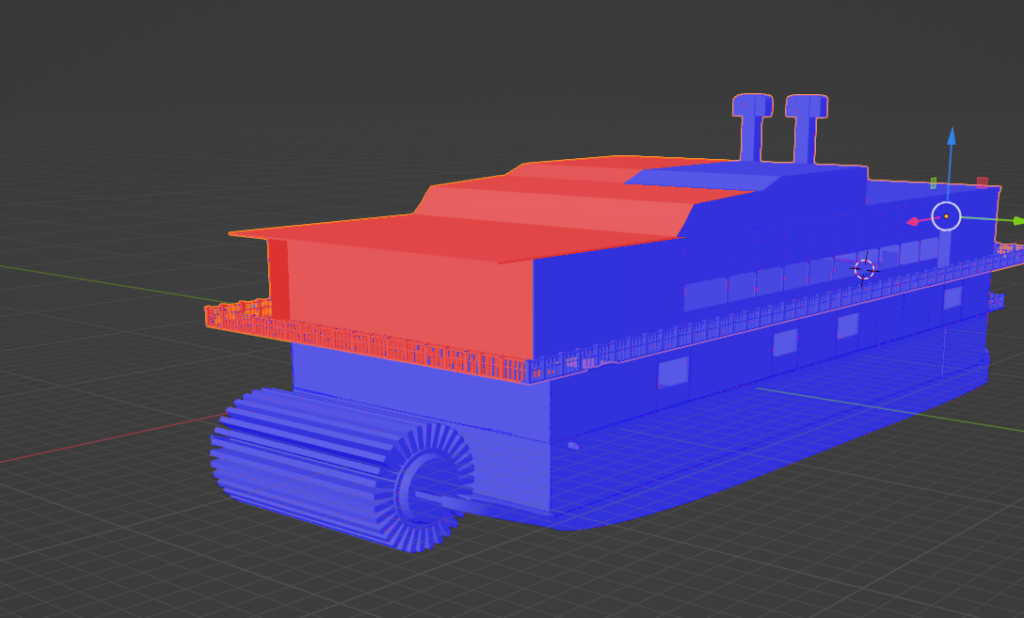
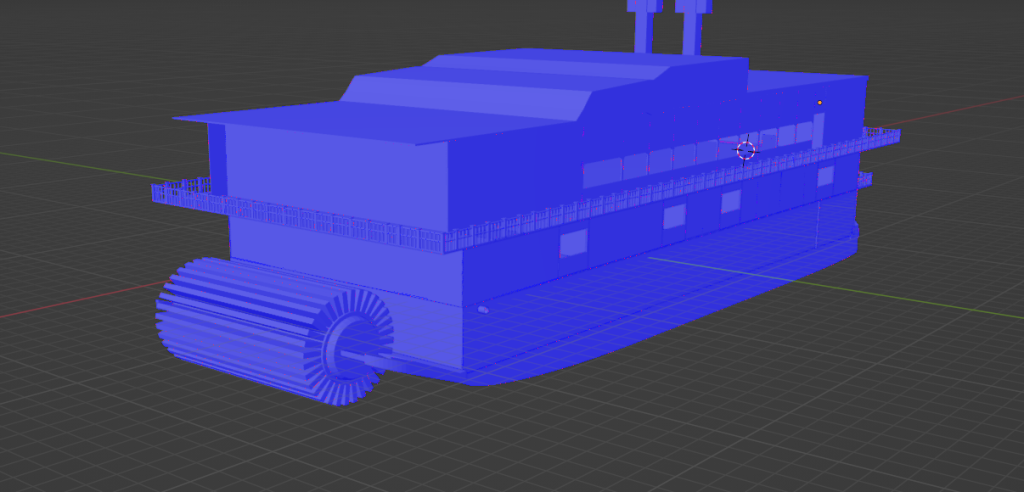
After finishing the skirting boards throughout the ship, I created the paddles which are located on the rear of the boat, I did this because the player will be able to see it when walking around on the balcony.
I then made an engine room.
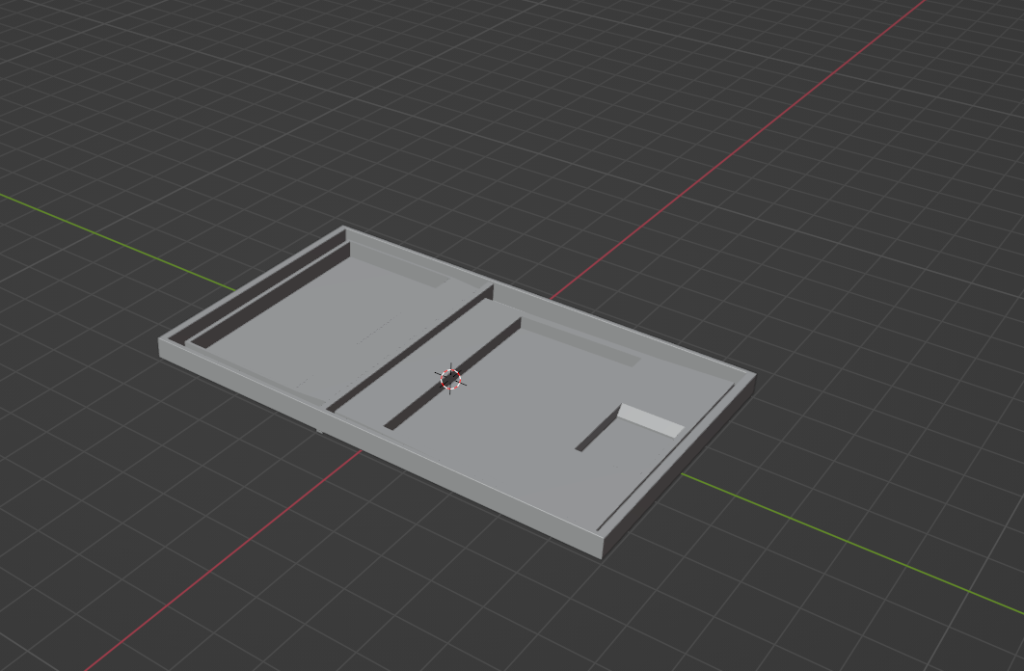
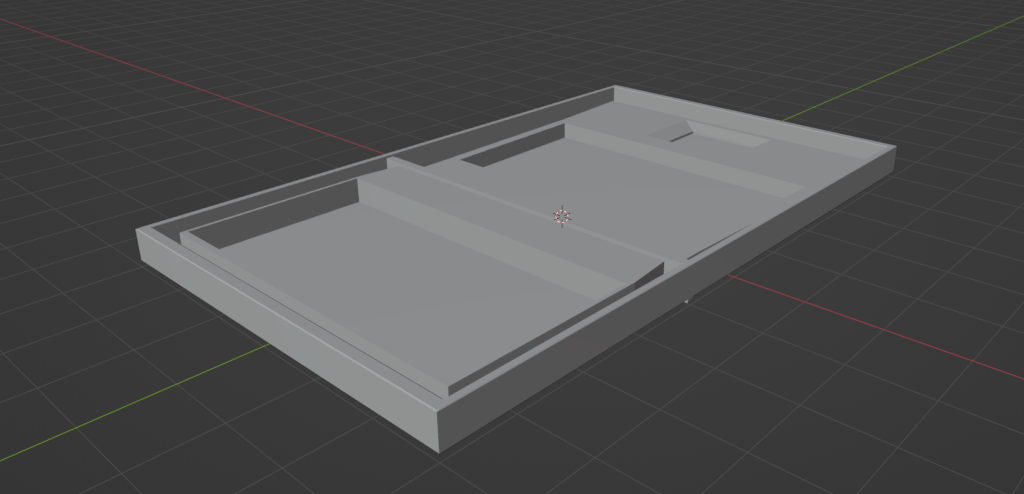
Below are some untextured views of other areas of the boat.

For my role in the Major Project, I had to research several items which correlates with my job, this being a 3d modeler. To begin the research, I started by looking back on my proposal and the different blog posts that I created.
Firstly, I looked at the idea development post, this is because it includes 2 mood boards that I created in preparation for modelling the boat, this is helpful because it helps me understand different features of the paddle steamer which I can model to add detail to the final boat.
Moving on from the proposal, I began to look at what models I needed to make and if I needed any relevant images to assist me in the design, production and texturing phases of asset creation. For the most part I’m able to get the models created without references, however for some I needed some help on what they looked like, the models in question are below.
Snub Revolver
For the revolver I needed a reference image to get the correct dimensions of the model. Below is the image that I used for reference/research; this also helped me decide the textures needed.

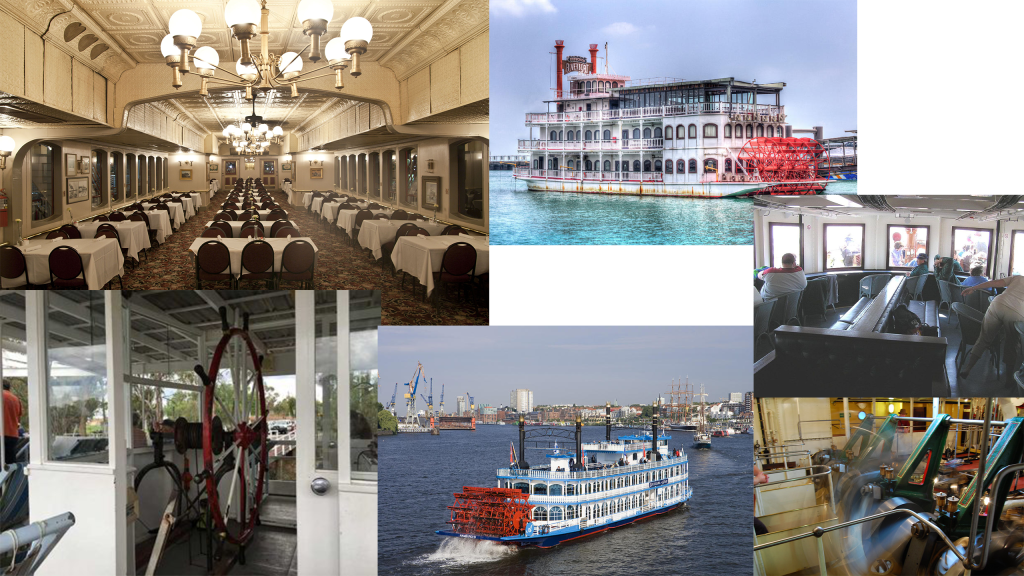
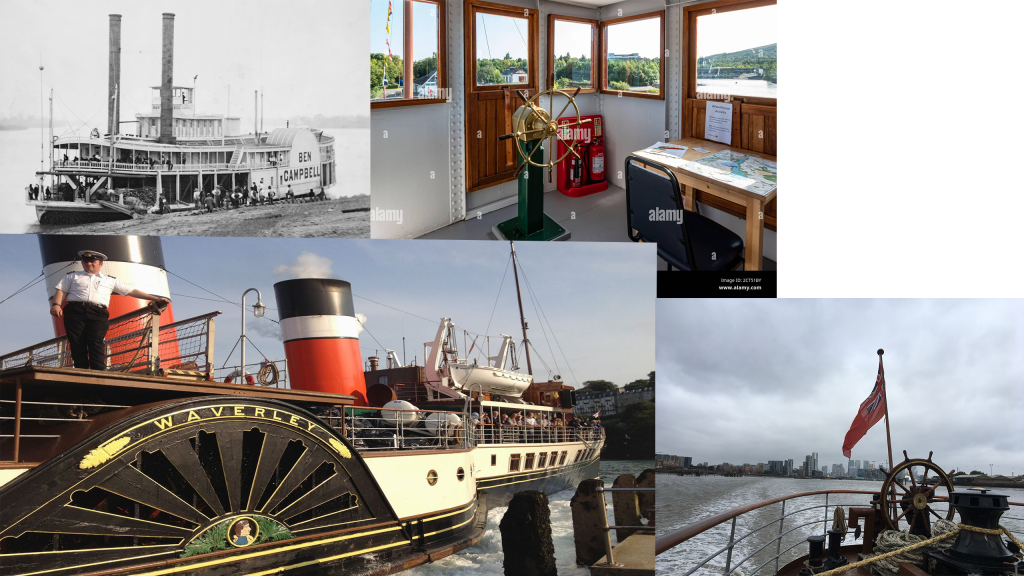
Boat
For my Boat I used my mood boards from my idea development blog as I already had all the images I needed just from that.
Toilet
For the toilet model I needed something that represented the time, therefore I used an old drawing from the victorian time, as it isnt too far off of the games time period, therefore I think it still works.

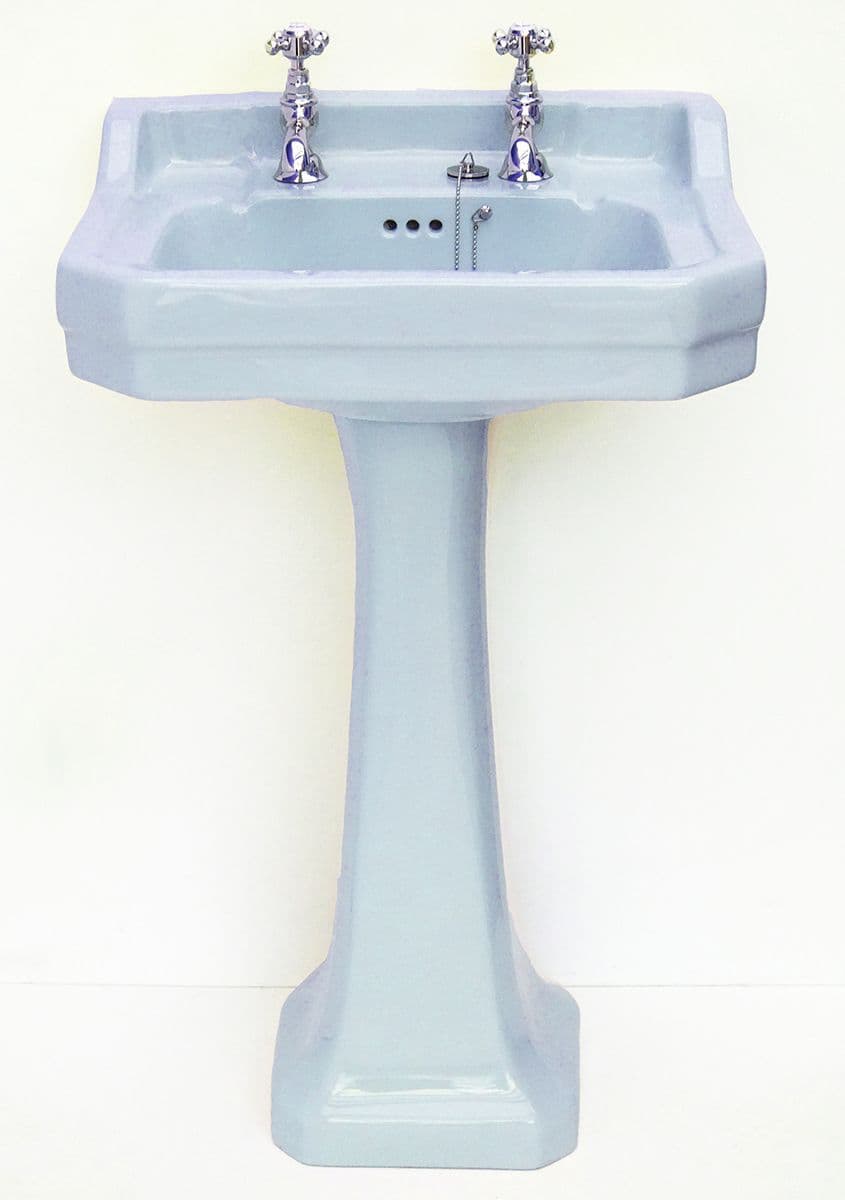
Sink
For the sink I decided a specific design based on an image I found, this helped me decide how the sink would look when modelled.
References
BrokenBog, (N.D),Armitage Blue Edwardian Art Deco Sink, Available Online: Armitage Blue Edwardian Art Deco 61cm 2TH Basin / Sink & Pedestal (brokenbog.com) [Accessed Online 15/02/23]
OldHouseOnline, (2021), The History of the Lavatory, Available Online: The History of the Lavatory (oldhouseonline.com) [Accessed Online 16/02/23]
Wikipedia, (N.D) Snubnosed revolver, Available Online: Snubnosed revolver – Wikipedia [Accessed Online 14/02/23]